Sign Apps with eSign
ESign is the most reliable way to sideload apps. We will provide a download link for a No-Logs version of ESign so you can get started right away.
Note: For iOS 17.7+, you need to use the Wi-Fi method, which we will explain in the final section.
Note: If you're using a dxsign certificate, this process has been made significantly easier by the one-click install in the dxsign manage page. Go to https://dxsign.cc/manage, tap install, tap eSign, easy as that! (you still must enable the Wi-Fi method detailed at the end of the guide)
If you are NOT using a dxsign certificate, you may continue with the tutorial.
Warning: This guide requires developer mode to be enabled. To enable developer mode, go here.
eSign is no longer recommended, as it has been deprecated for what we know, and there are now better solutions for installing apps.
IPA Download link
https://r2.9z91.dev/ESignV5.0_noLogs_V1.1.ipa
Info: If you're unable to access this link, you can download the official Chinese version of ESign from the GitHub repository, or contact us for a new link.
Installing ESign's ipa
To install ESign on your iOS/iPadOS device you can use KravaSigner, a website that allows you to import your certificate for the purpose of installing .ipa files. Please note dxsign is NOT affiliated with KravaSign in any way.
To start go to this link:
https://sign.kravasign.com/
Then click choose file in the ipa section and select the ESign .ipa you downloaded before.
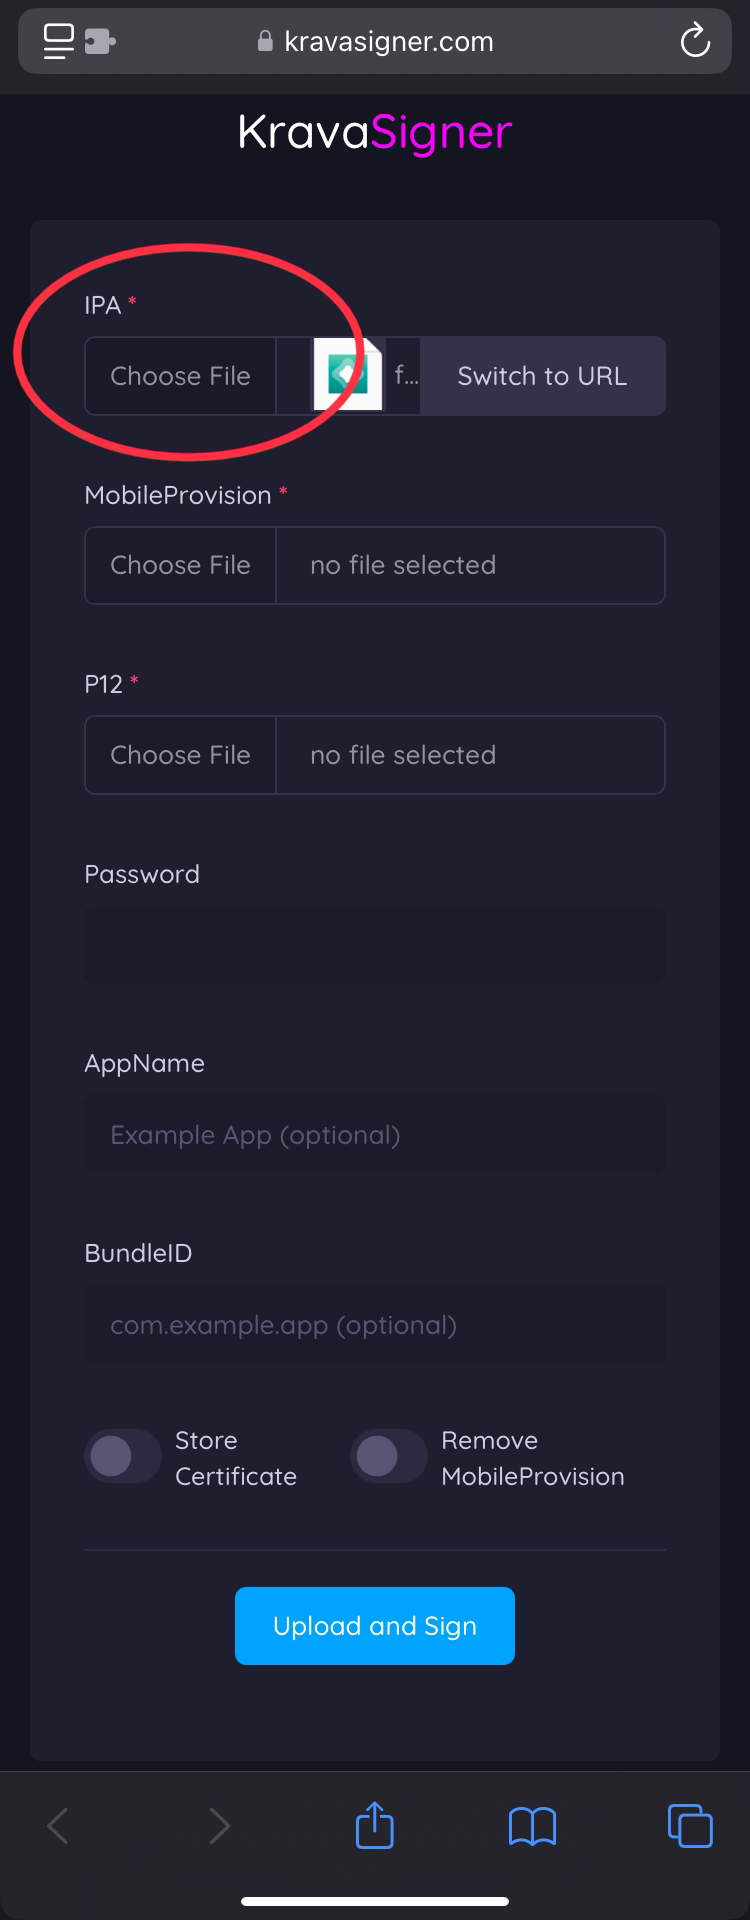
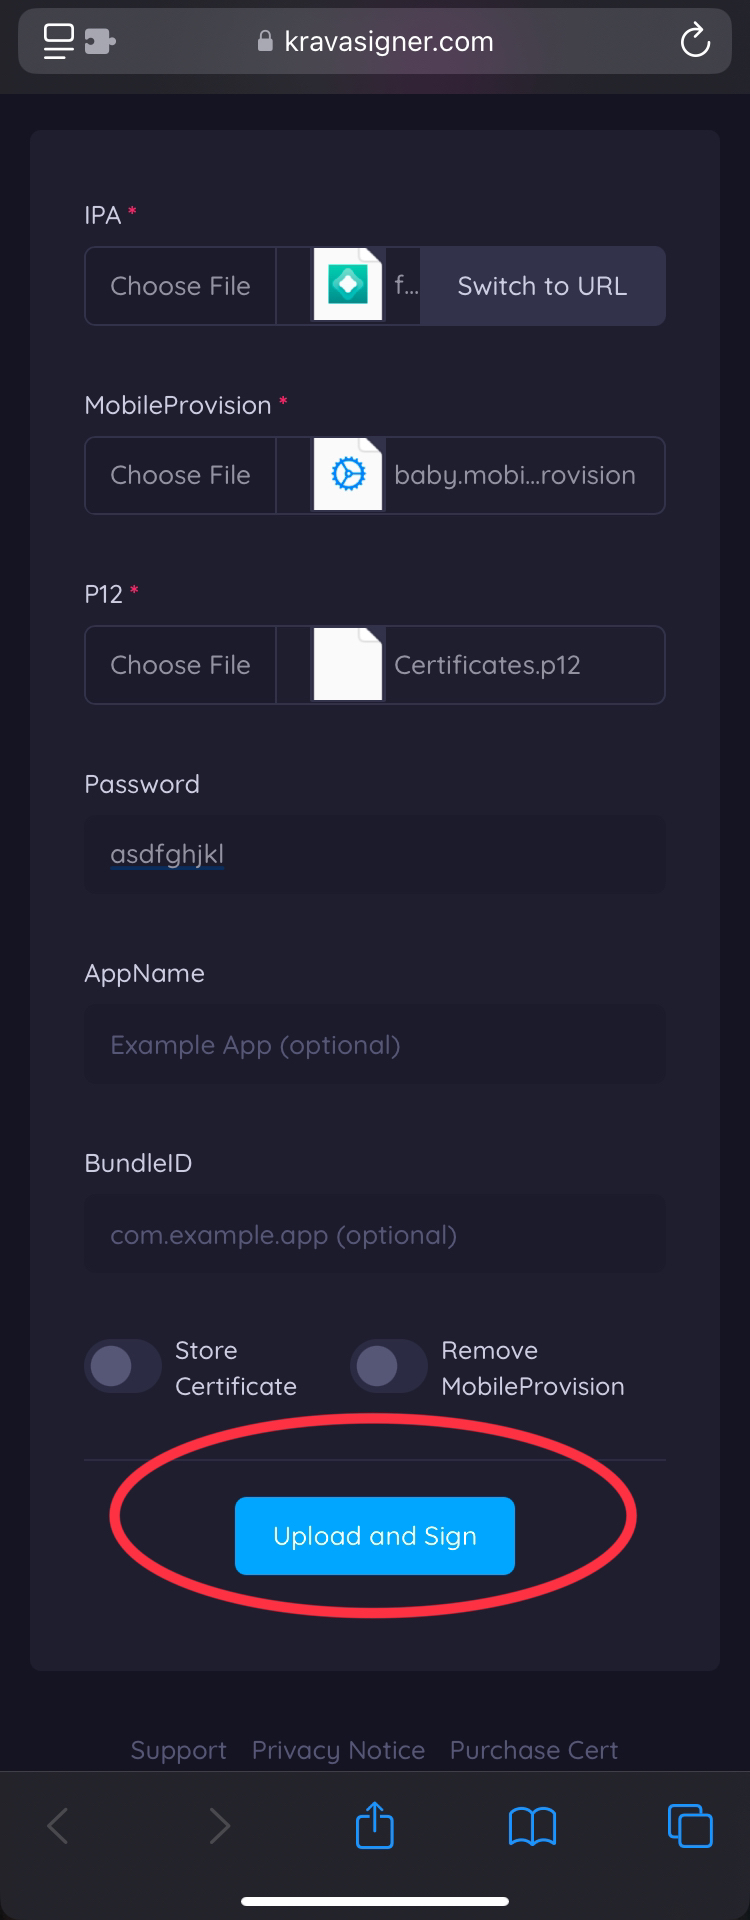
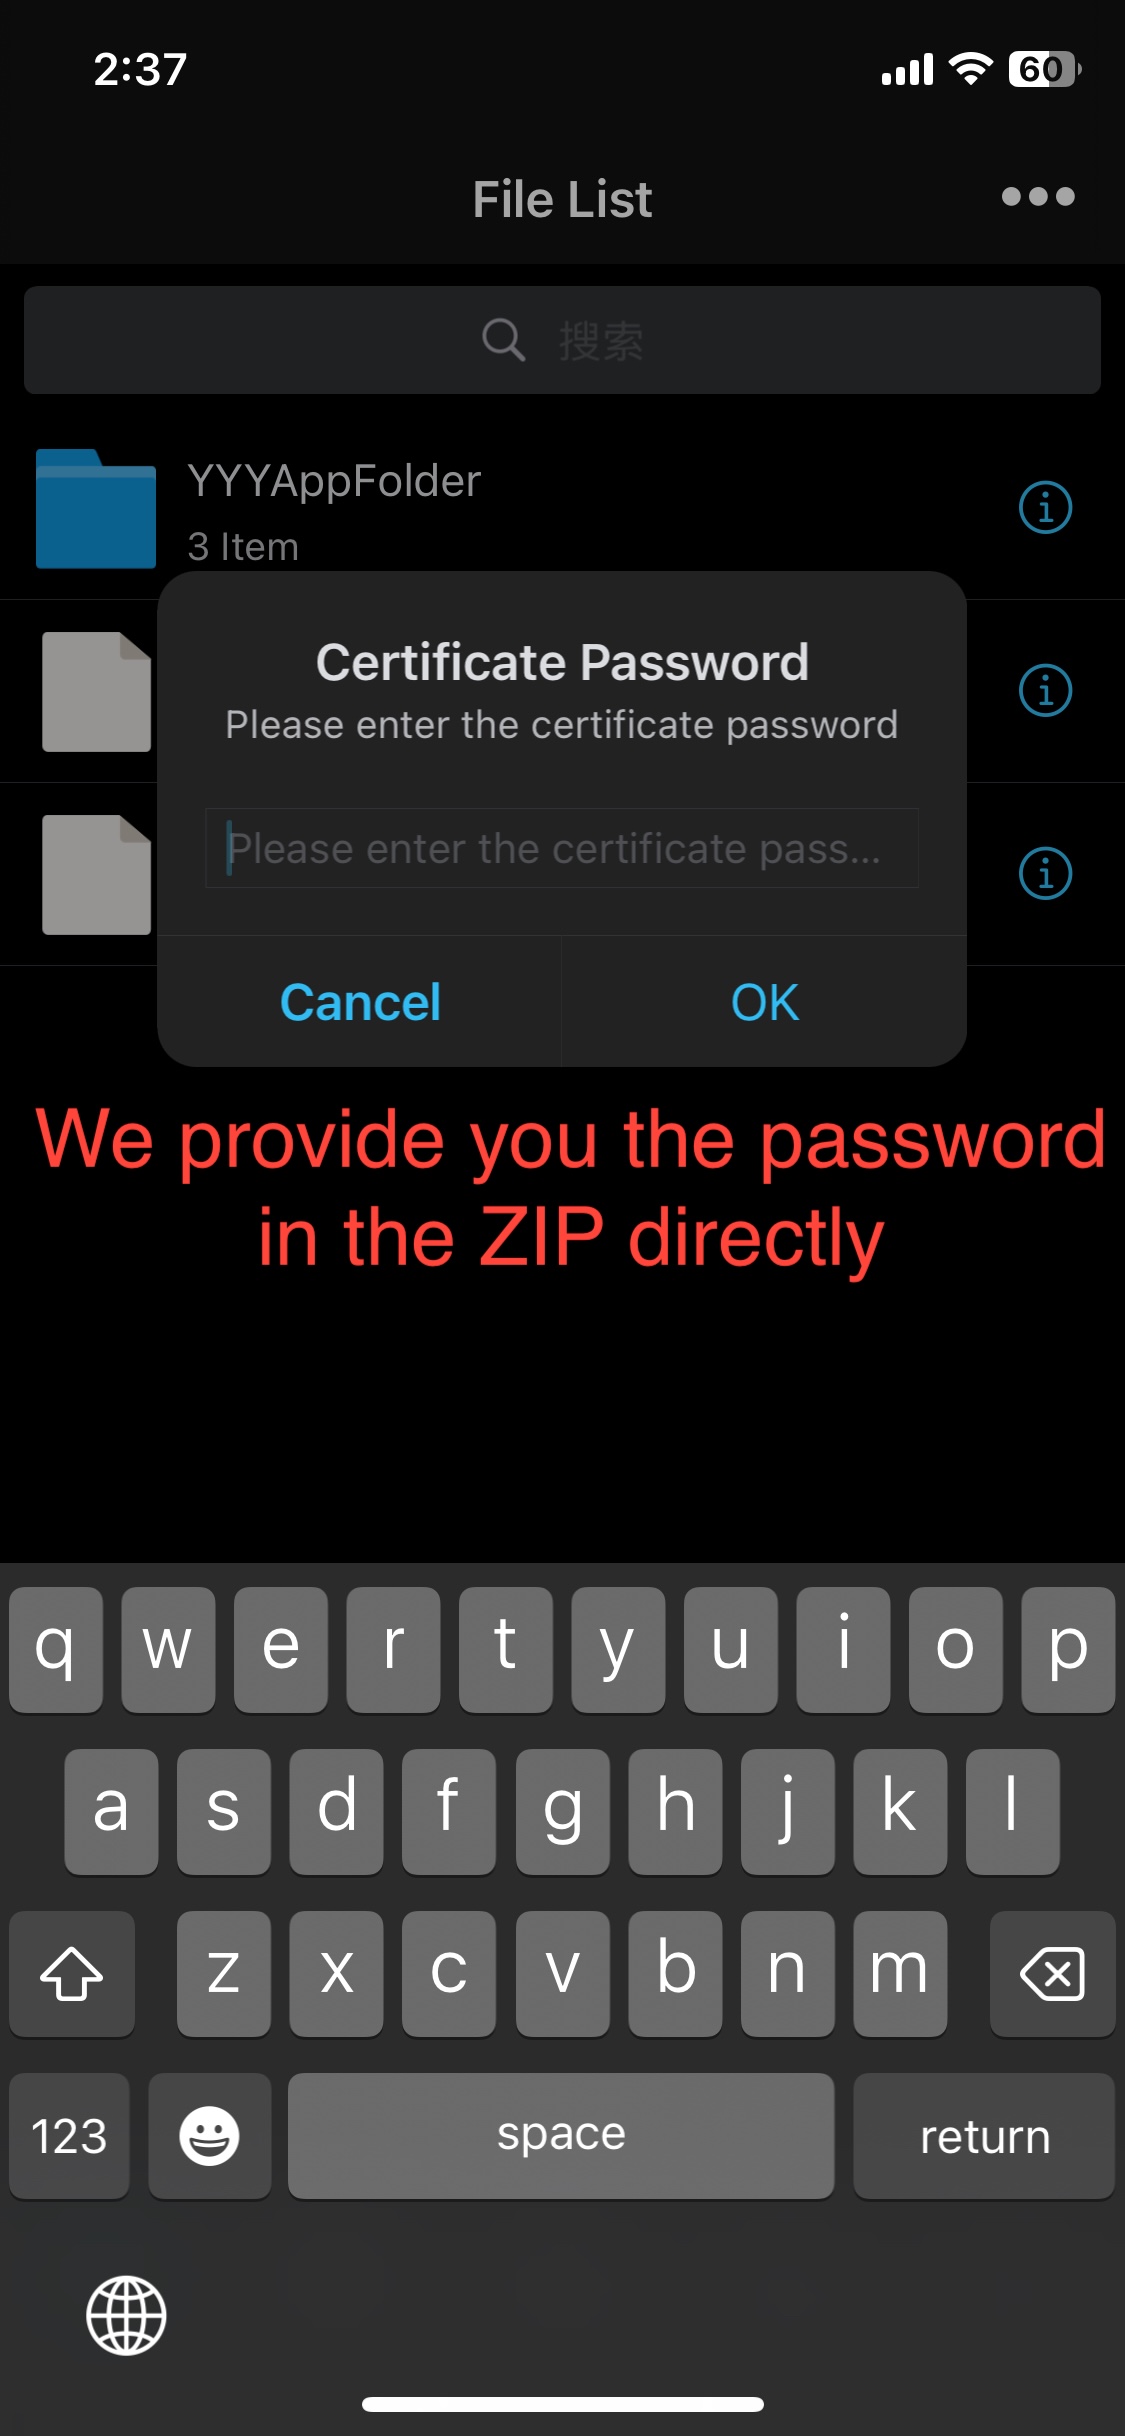
After that, import your mobile provision and .p12 file you obtained from dxsign.cc, and type in the password given within the file "password" in the folder you downloaded from dxsign. Common passwords are 1234 and abcdefg, but to be sure open your files and tap on the file, where it will then show you your password.
After importing that, click upload and sign.
Then when prompted click sign ipa, and then click Install IPA.
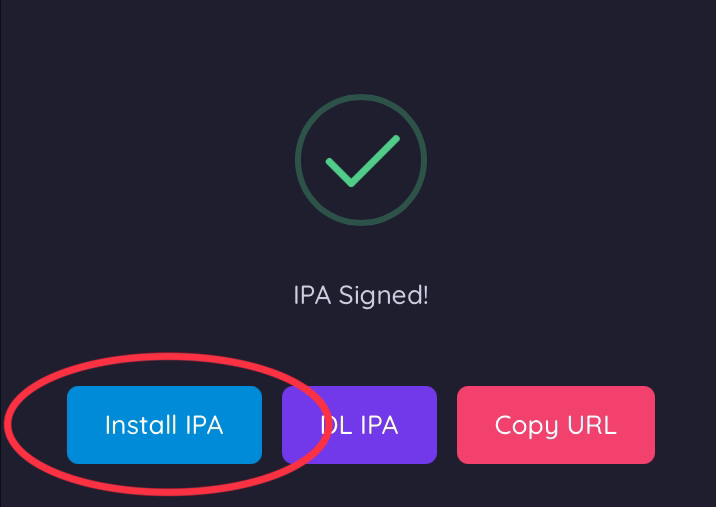
After that click install when prompted again, and move on to the next step after it completes installing and appears on your home screen.
Import your certificate
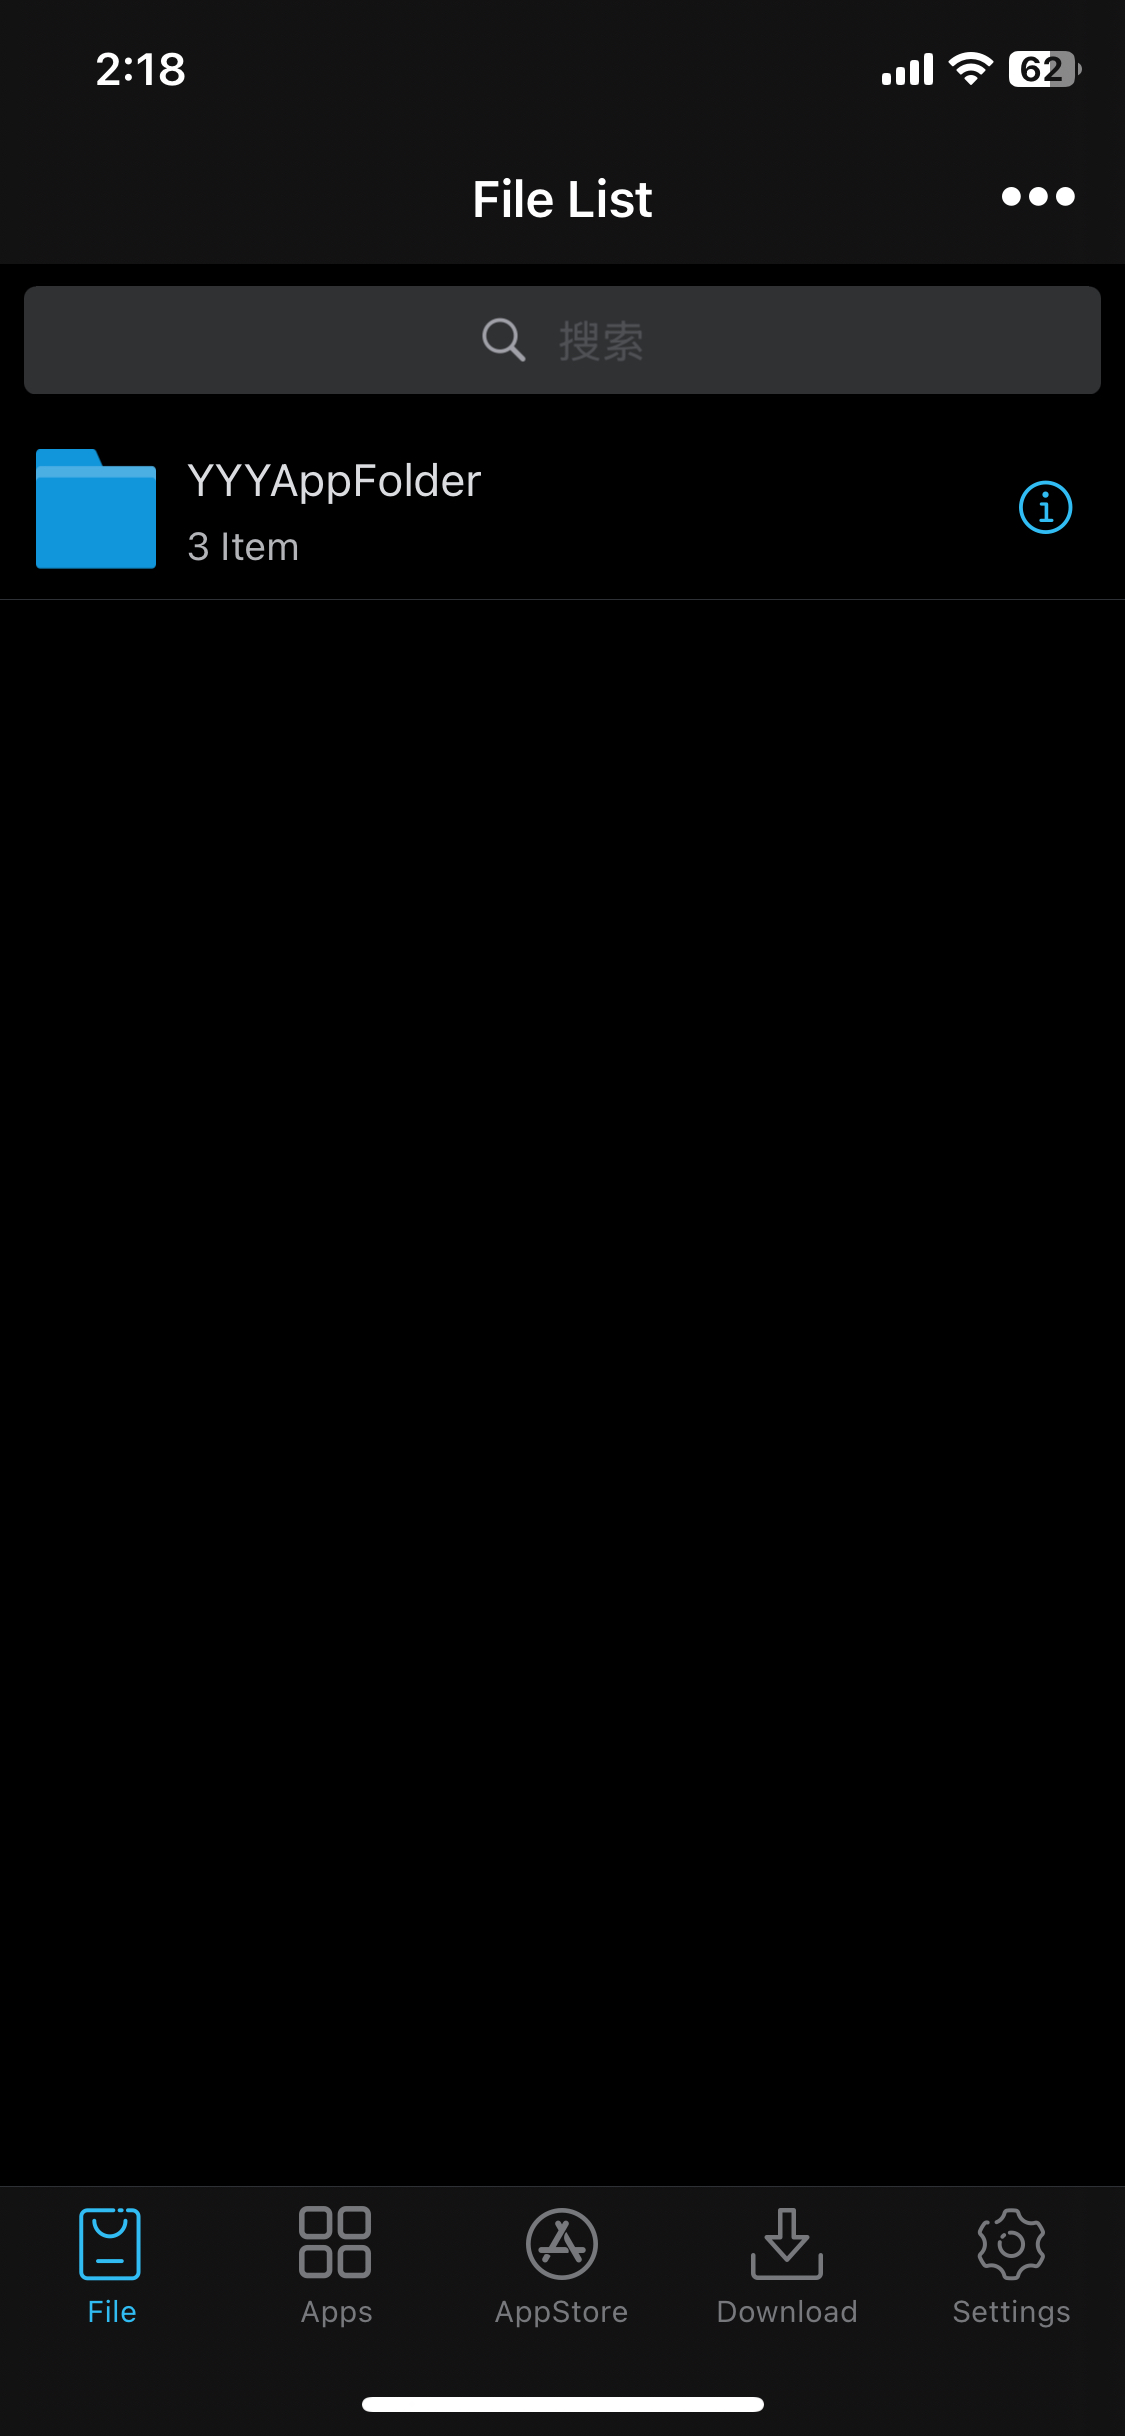
When you enter ESign, you'll be greeted by this screen.
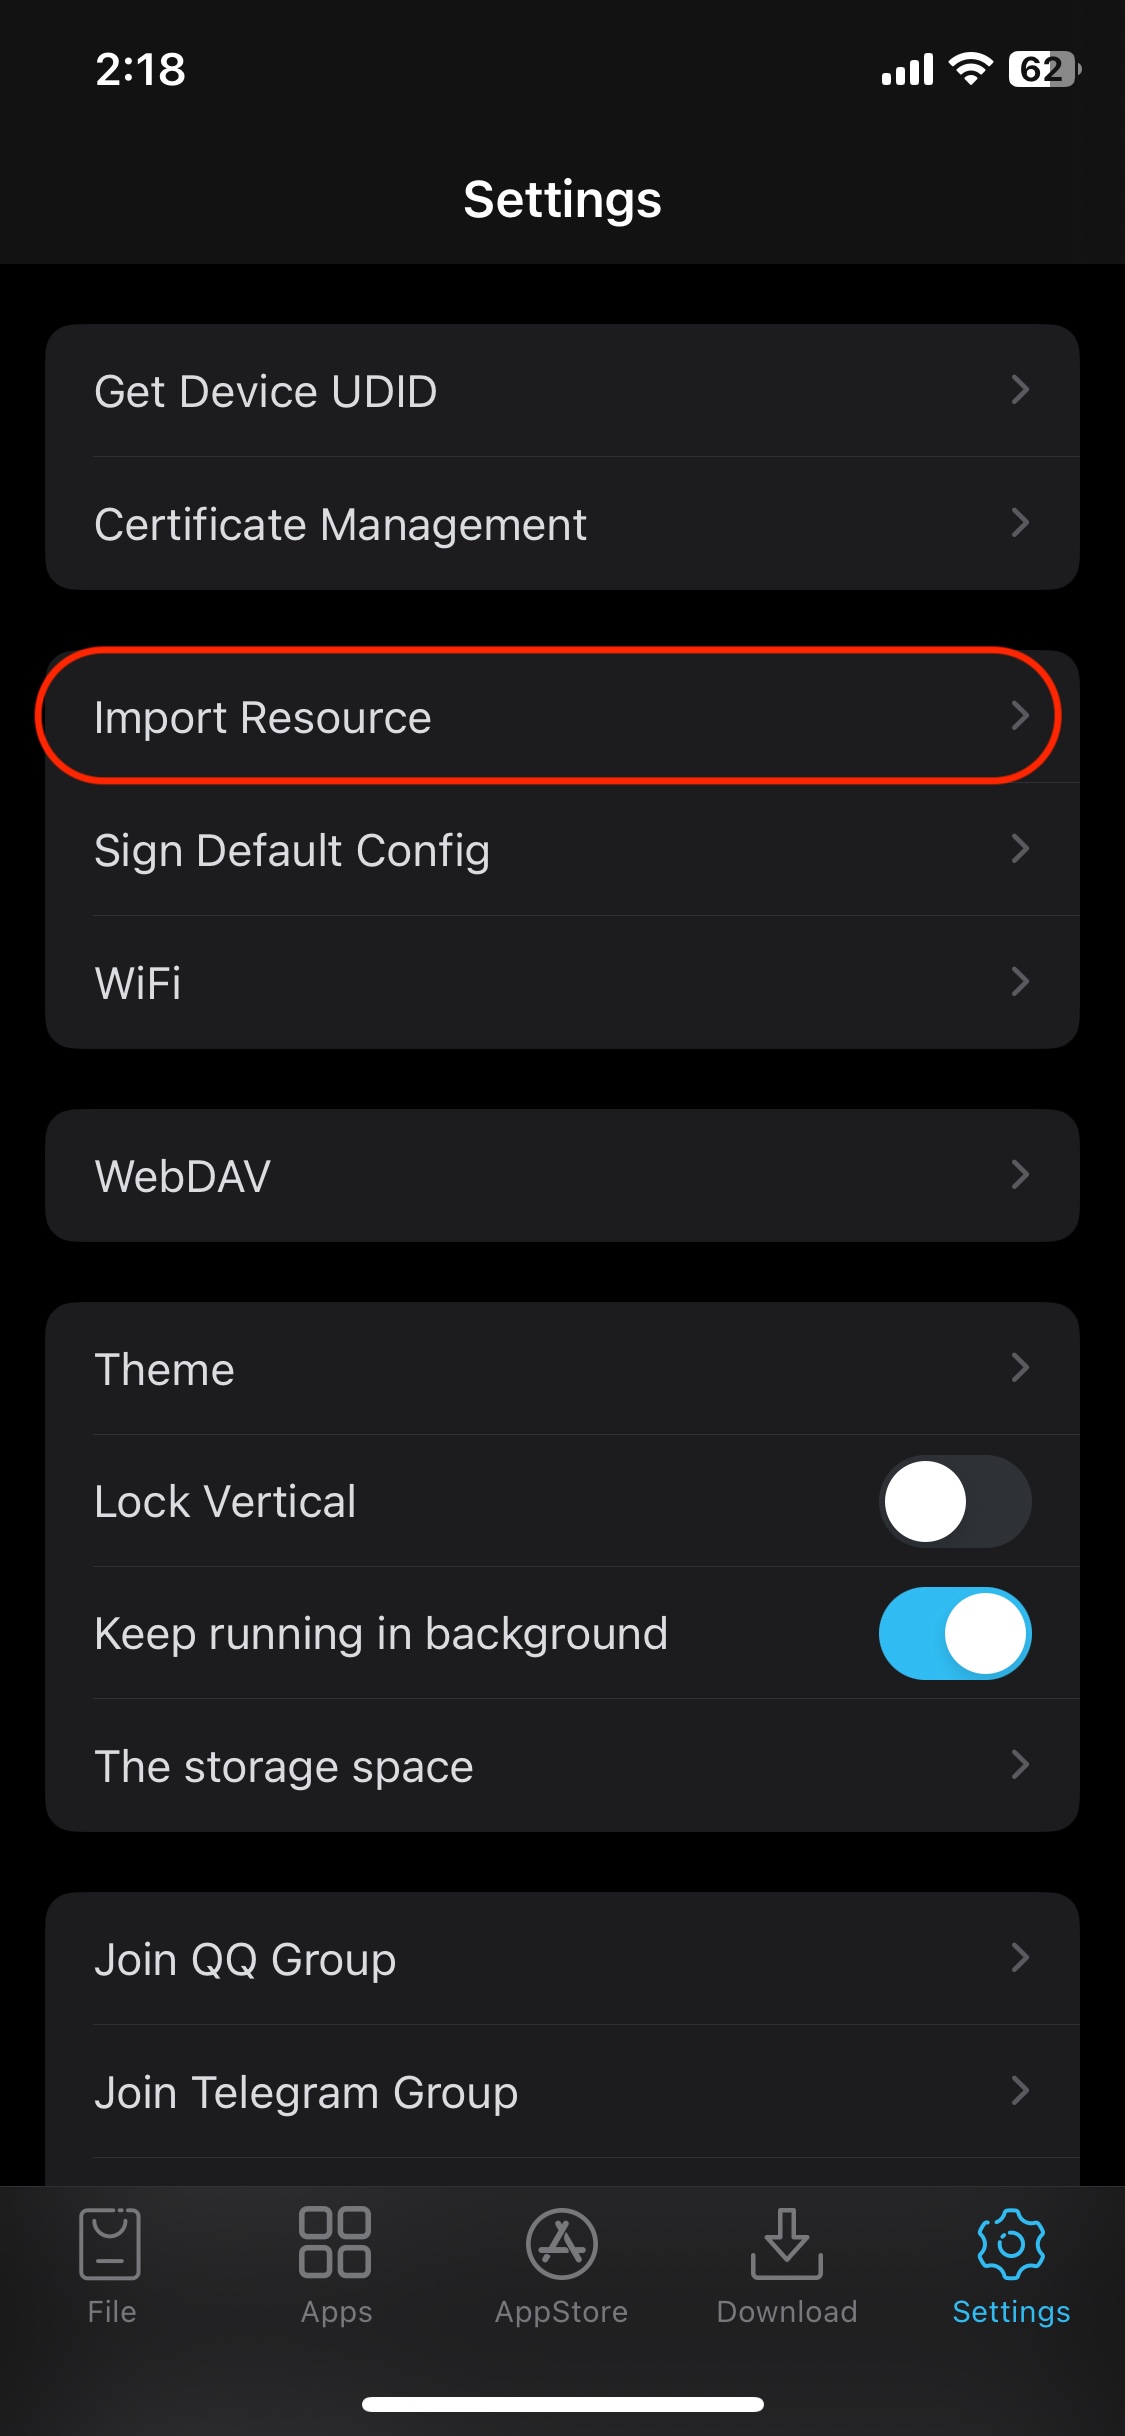
Go to Settings, select Import Resource, and upload both your certificate (.p12) and the .mobileprovision file, which can be downloaded from our dashboard or any other signing provider you use.
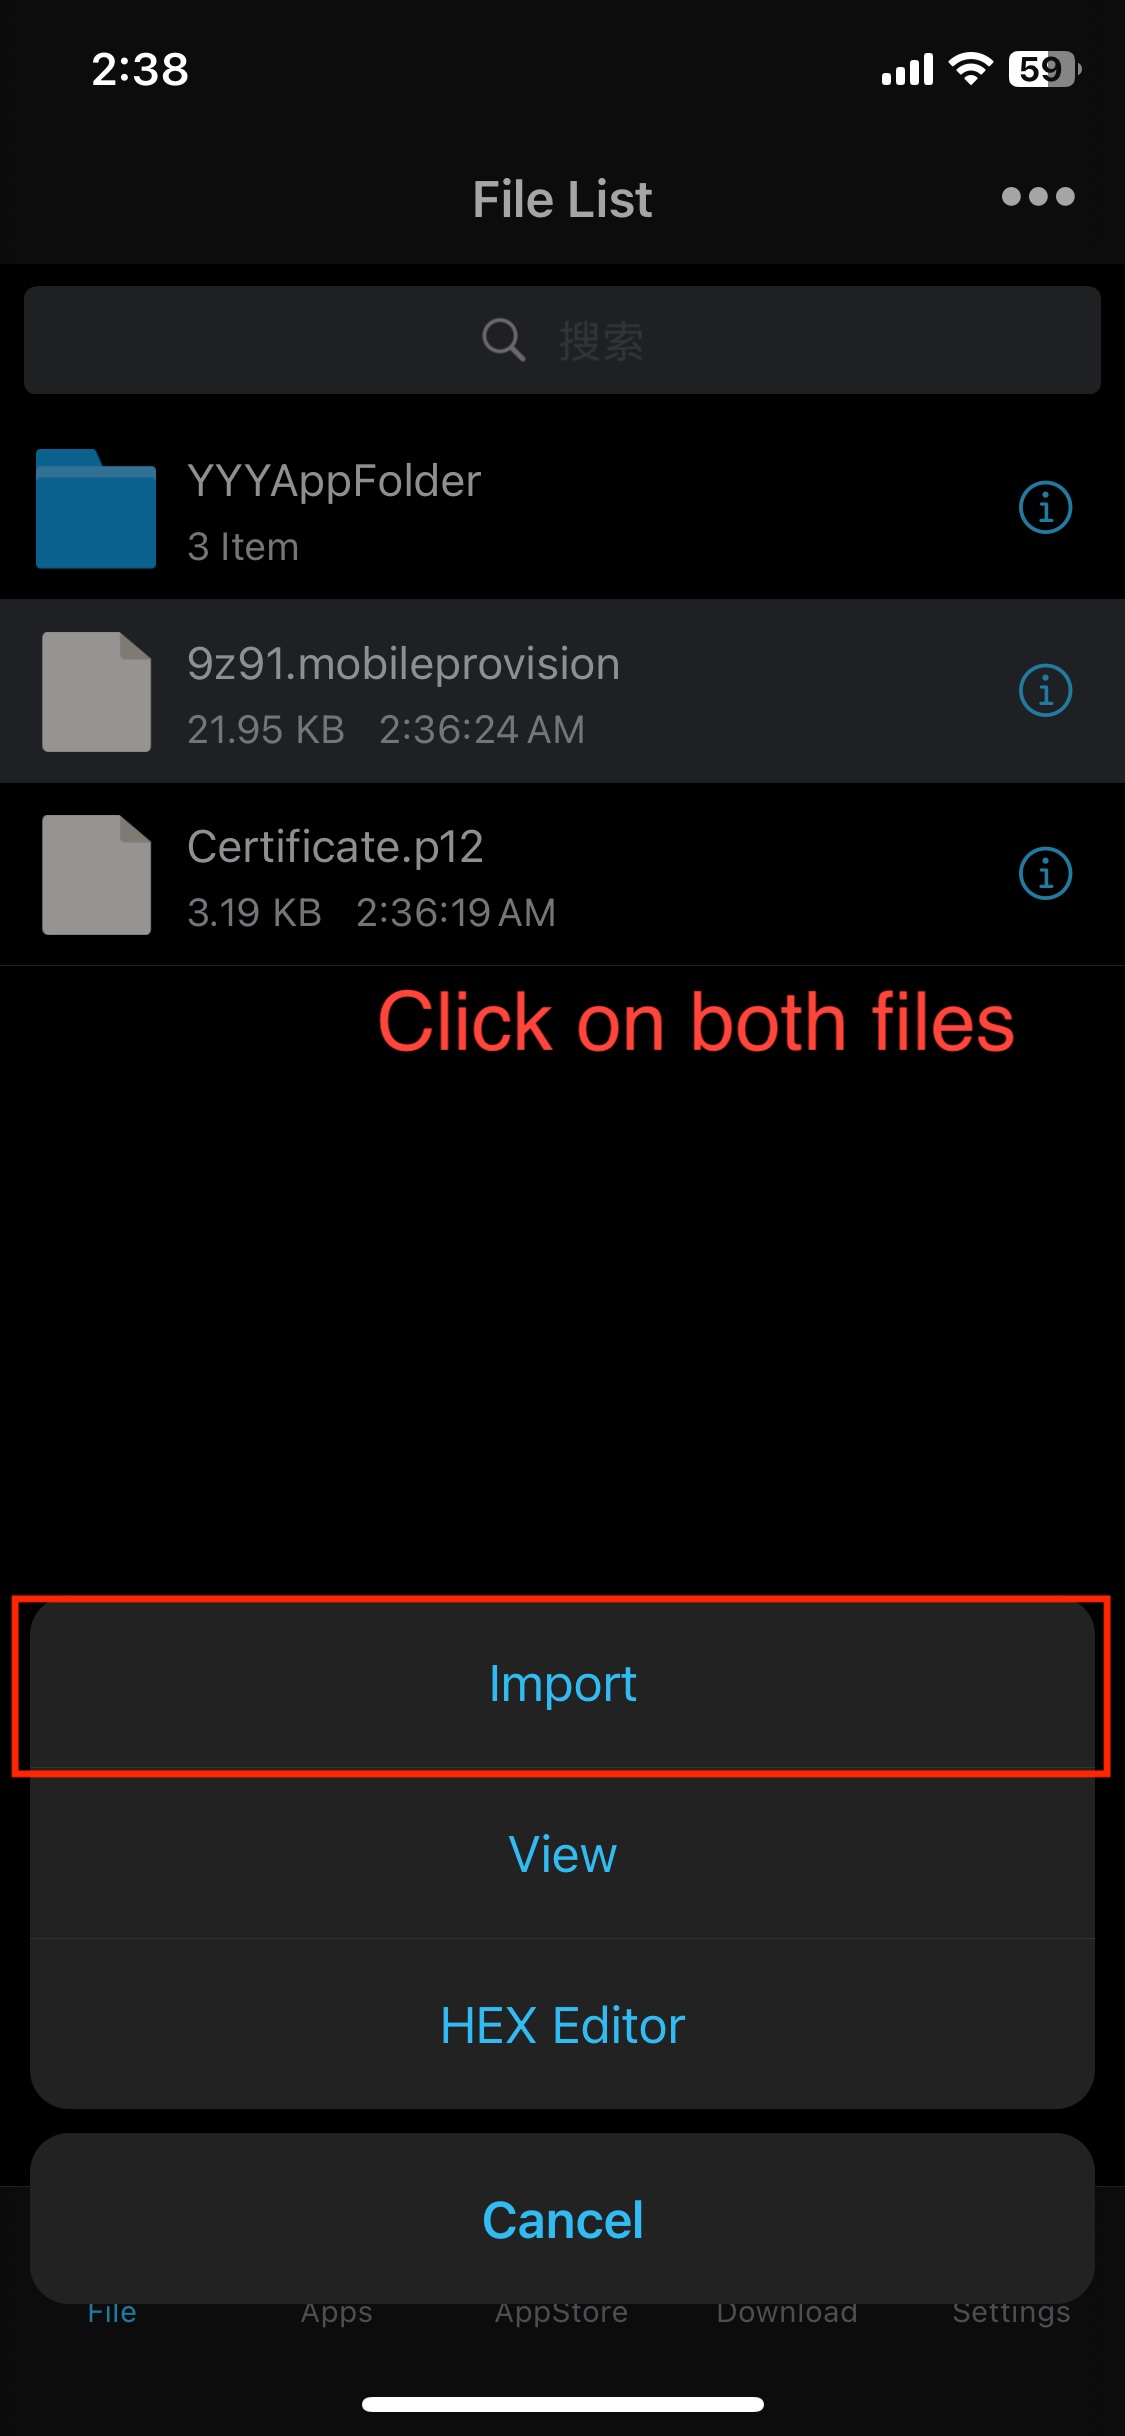
Now go back to the Files tab, click on both the certificate and .mobileprovision file, and select Import on the dropdown.
Info: When you import the certificate, you'll be prompted to enter the password.
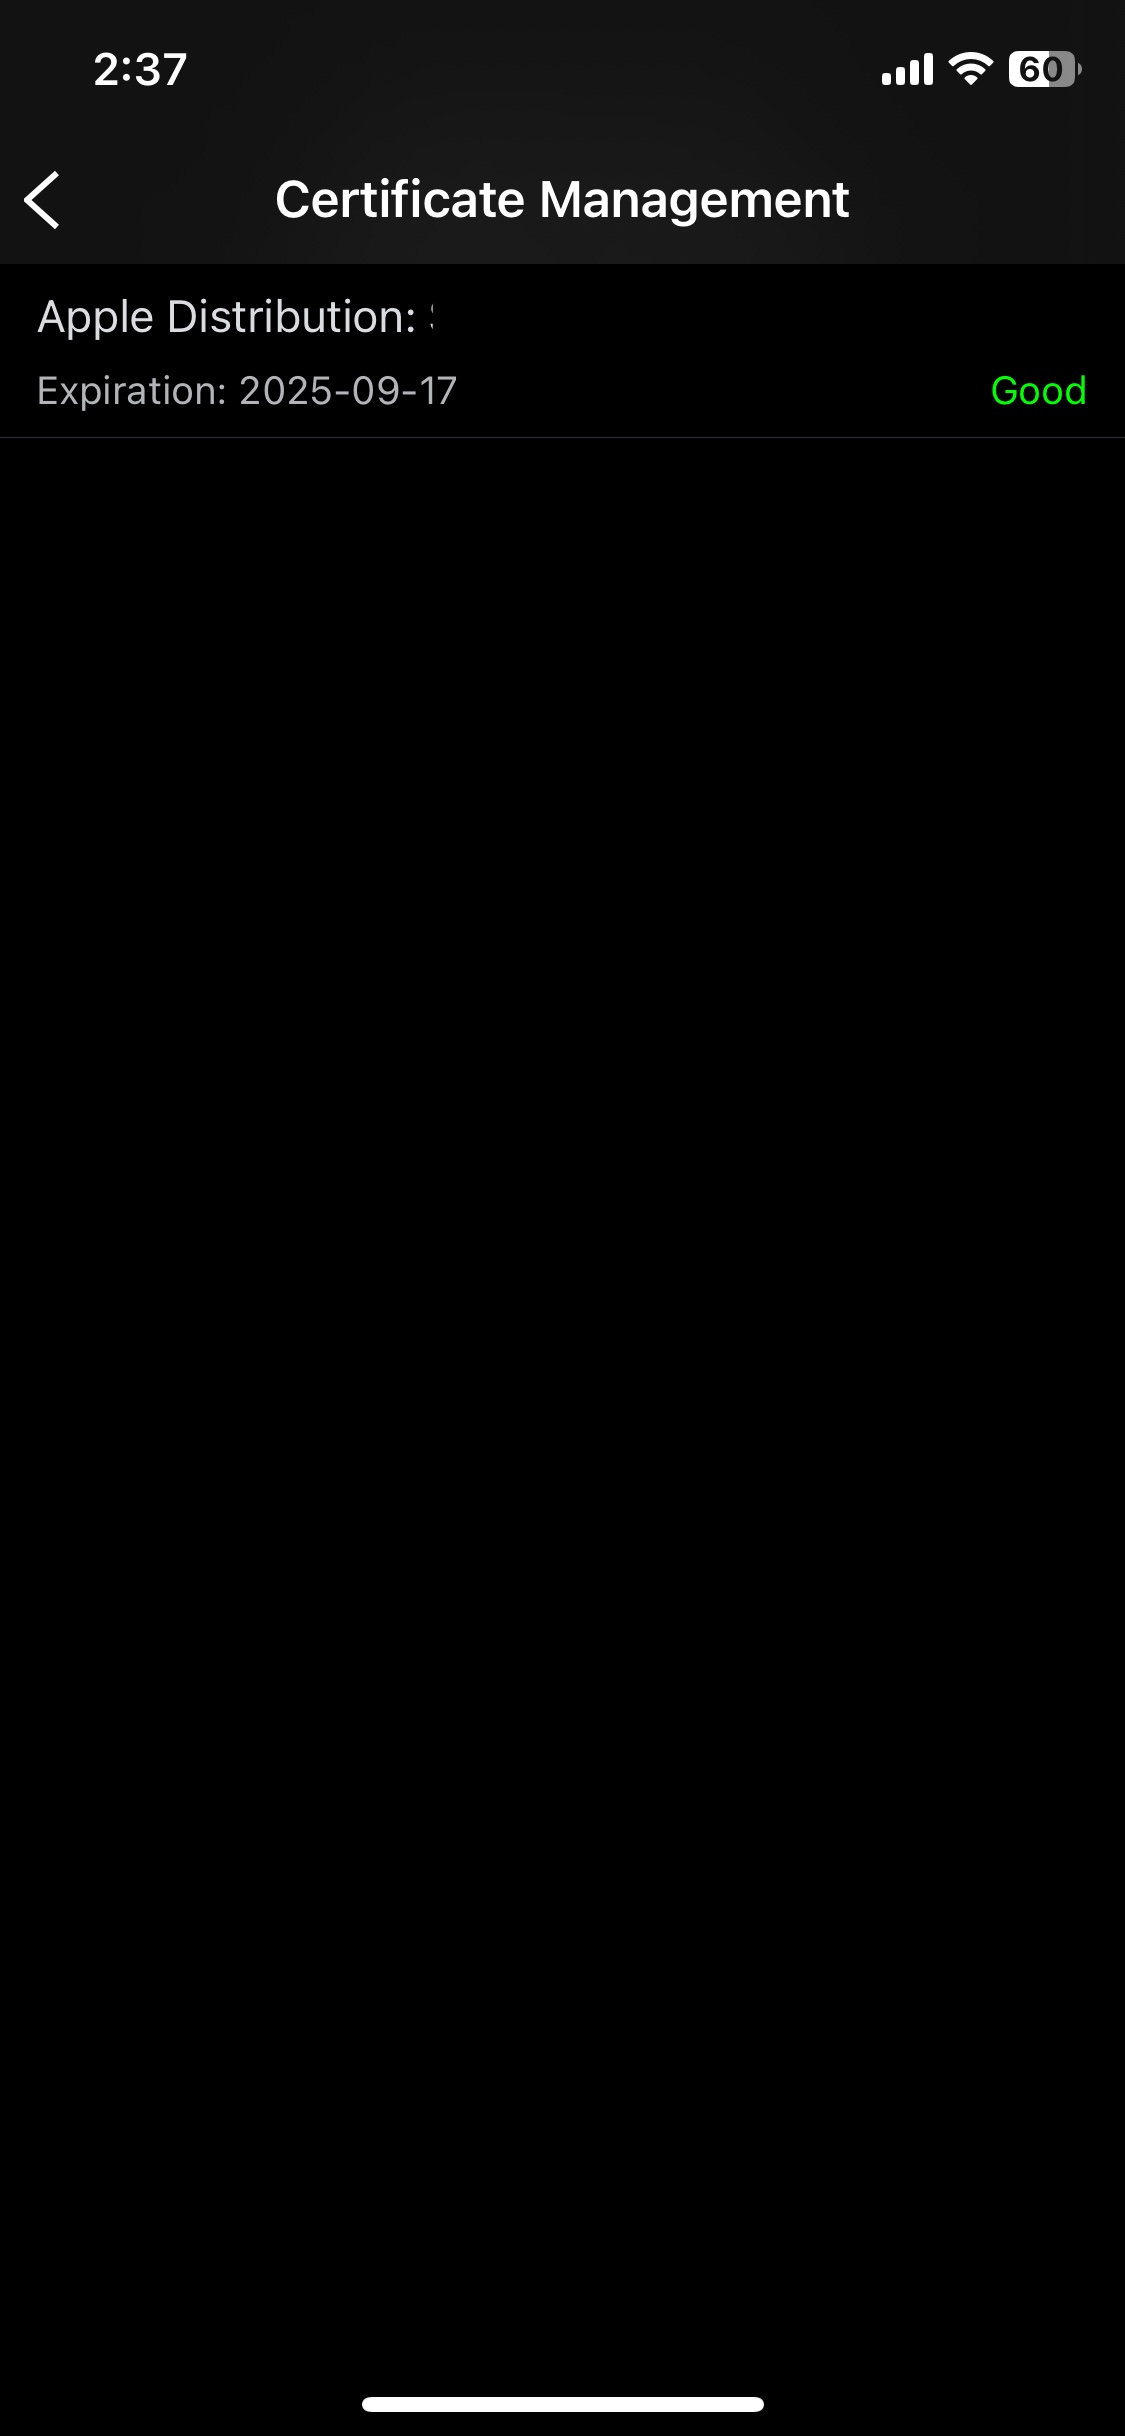
That's it! You can now return to the Settings tab and select Certificate Management to view the status of your certificate.
Sign your IPA
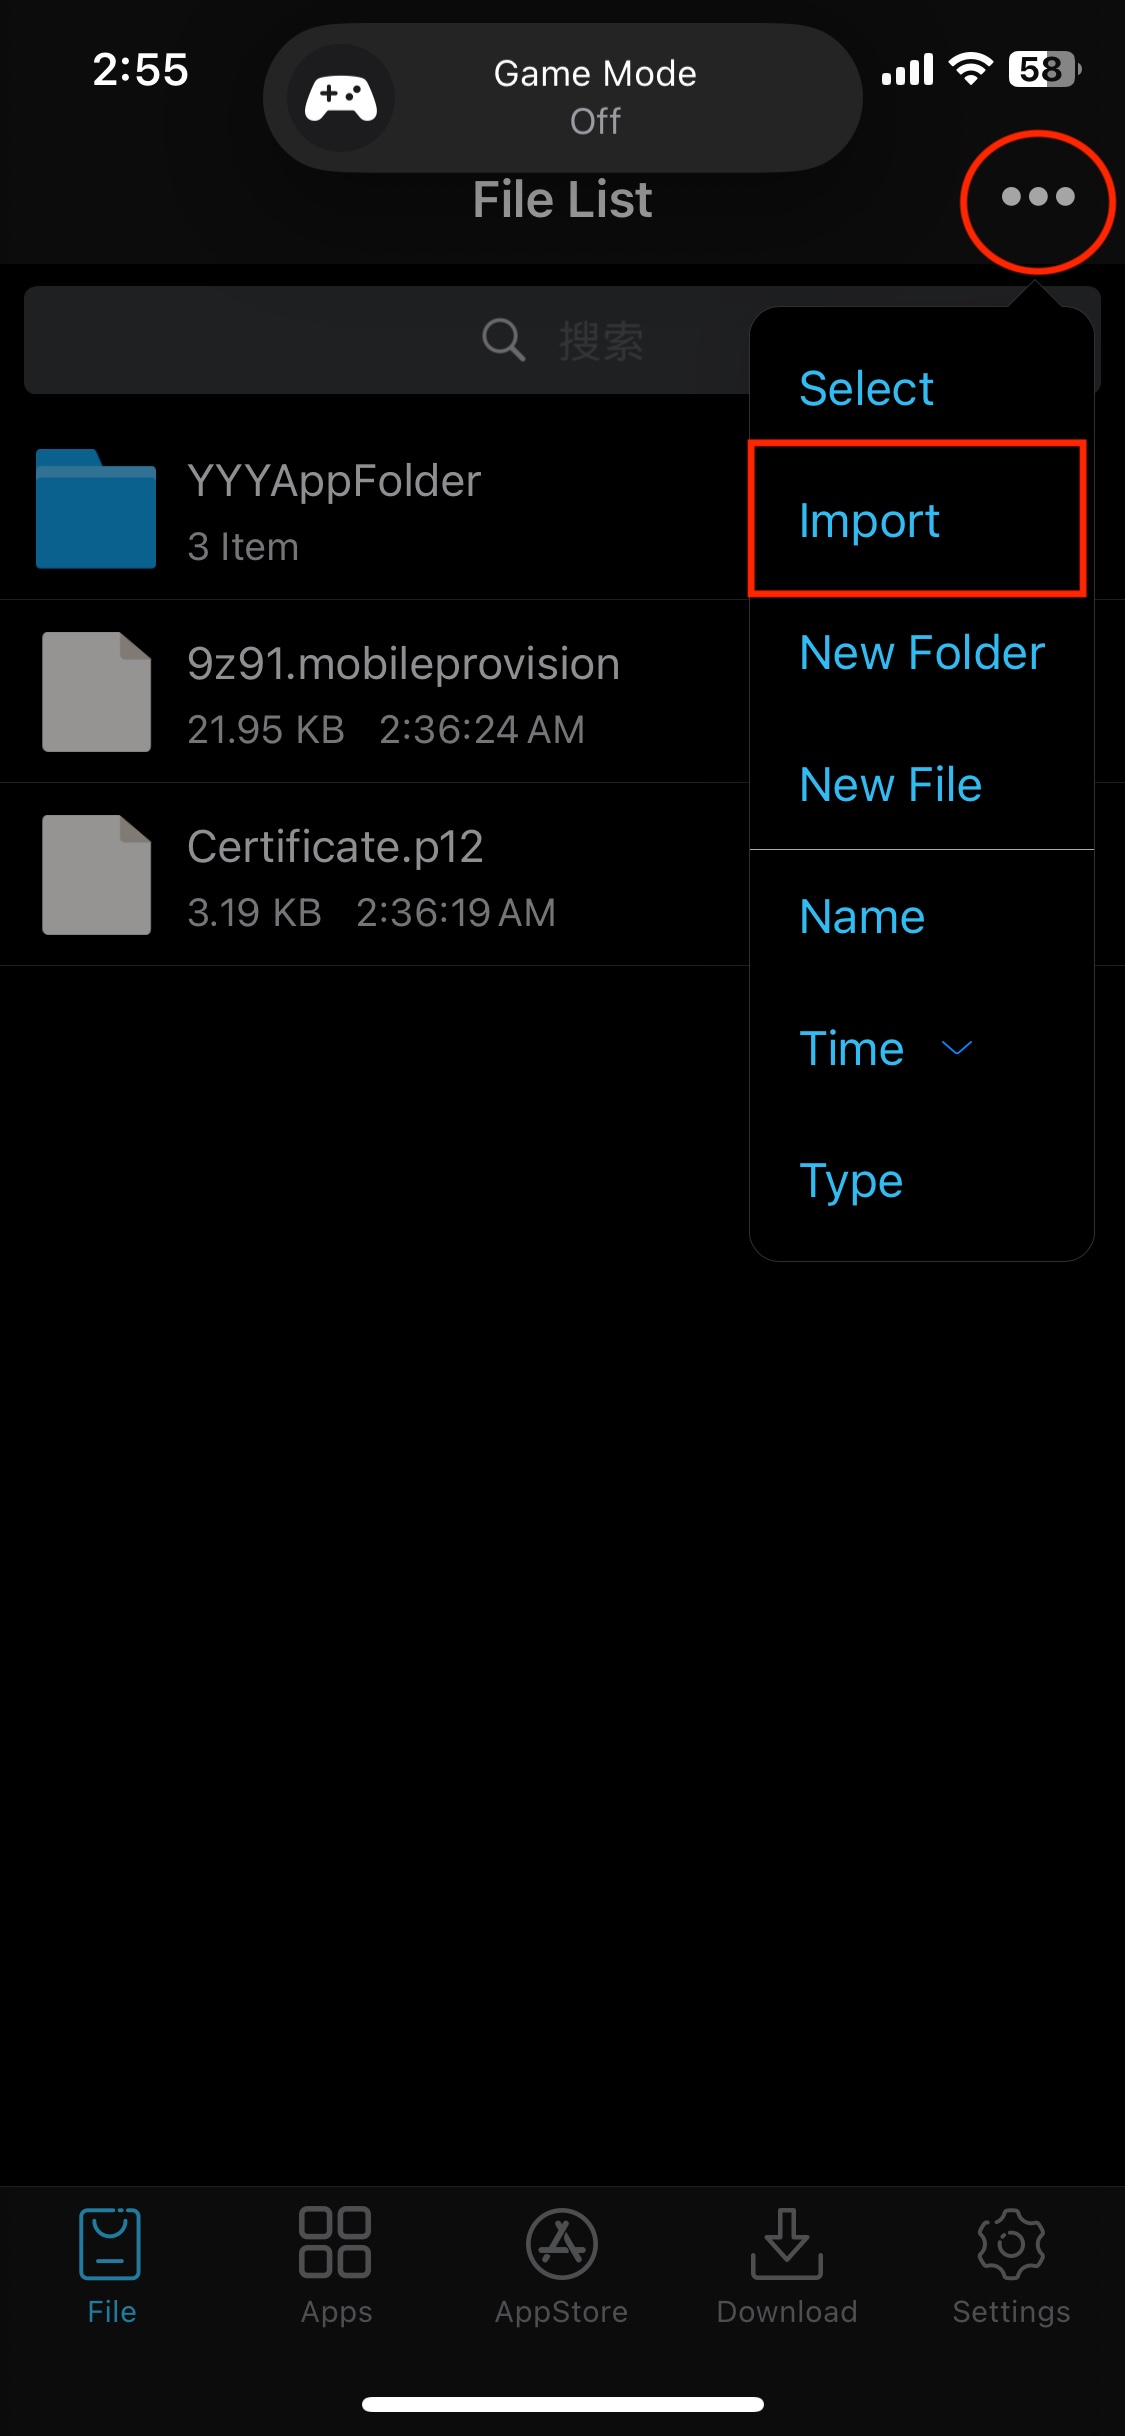
Click the three dots in the top bar, then select Import. Upload all the IPA files you want to sign.
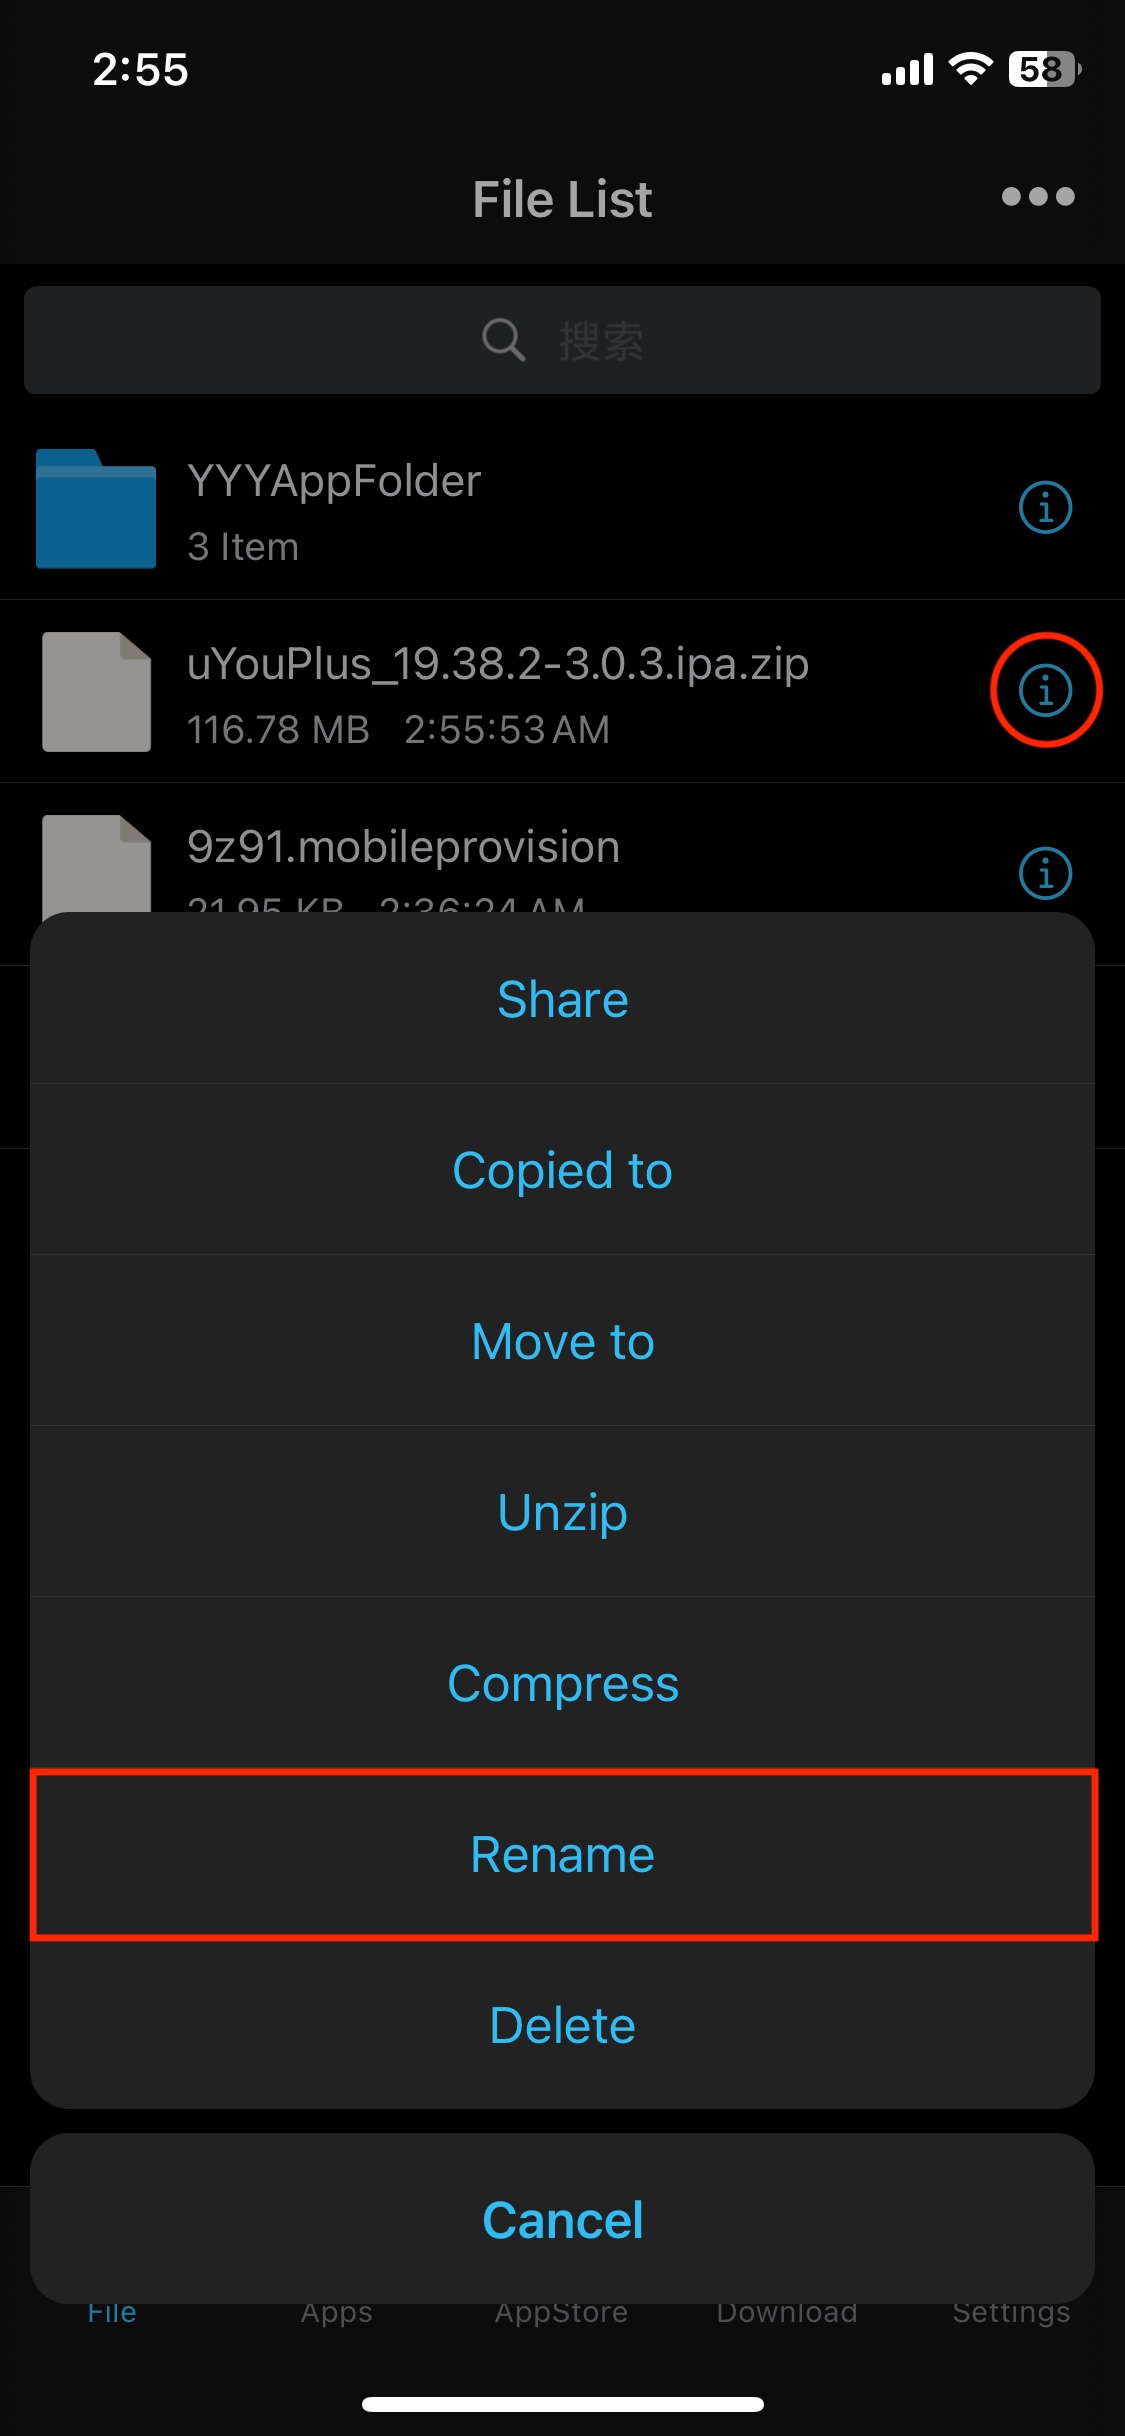
If your imported IPA files are in .zip format, click the info icon, select Rename, and remove the ".zip" extension. This happens because Safari automatically converts .ipa files to .zip format.
You should now see your app in the Unsigned tab. Click on the IPA file you want to sign, then select Signature.

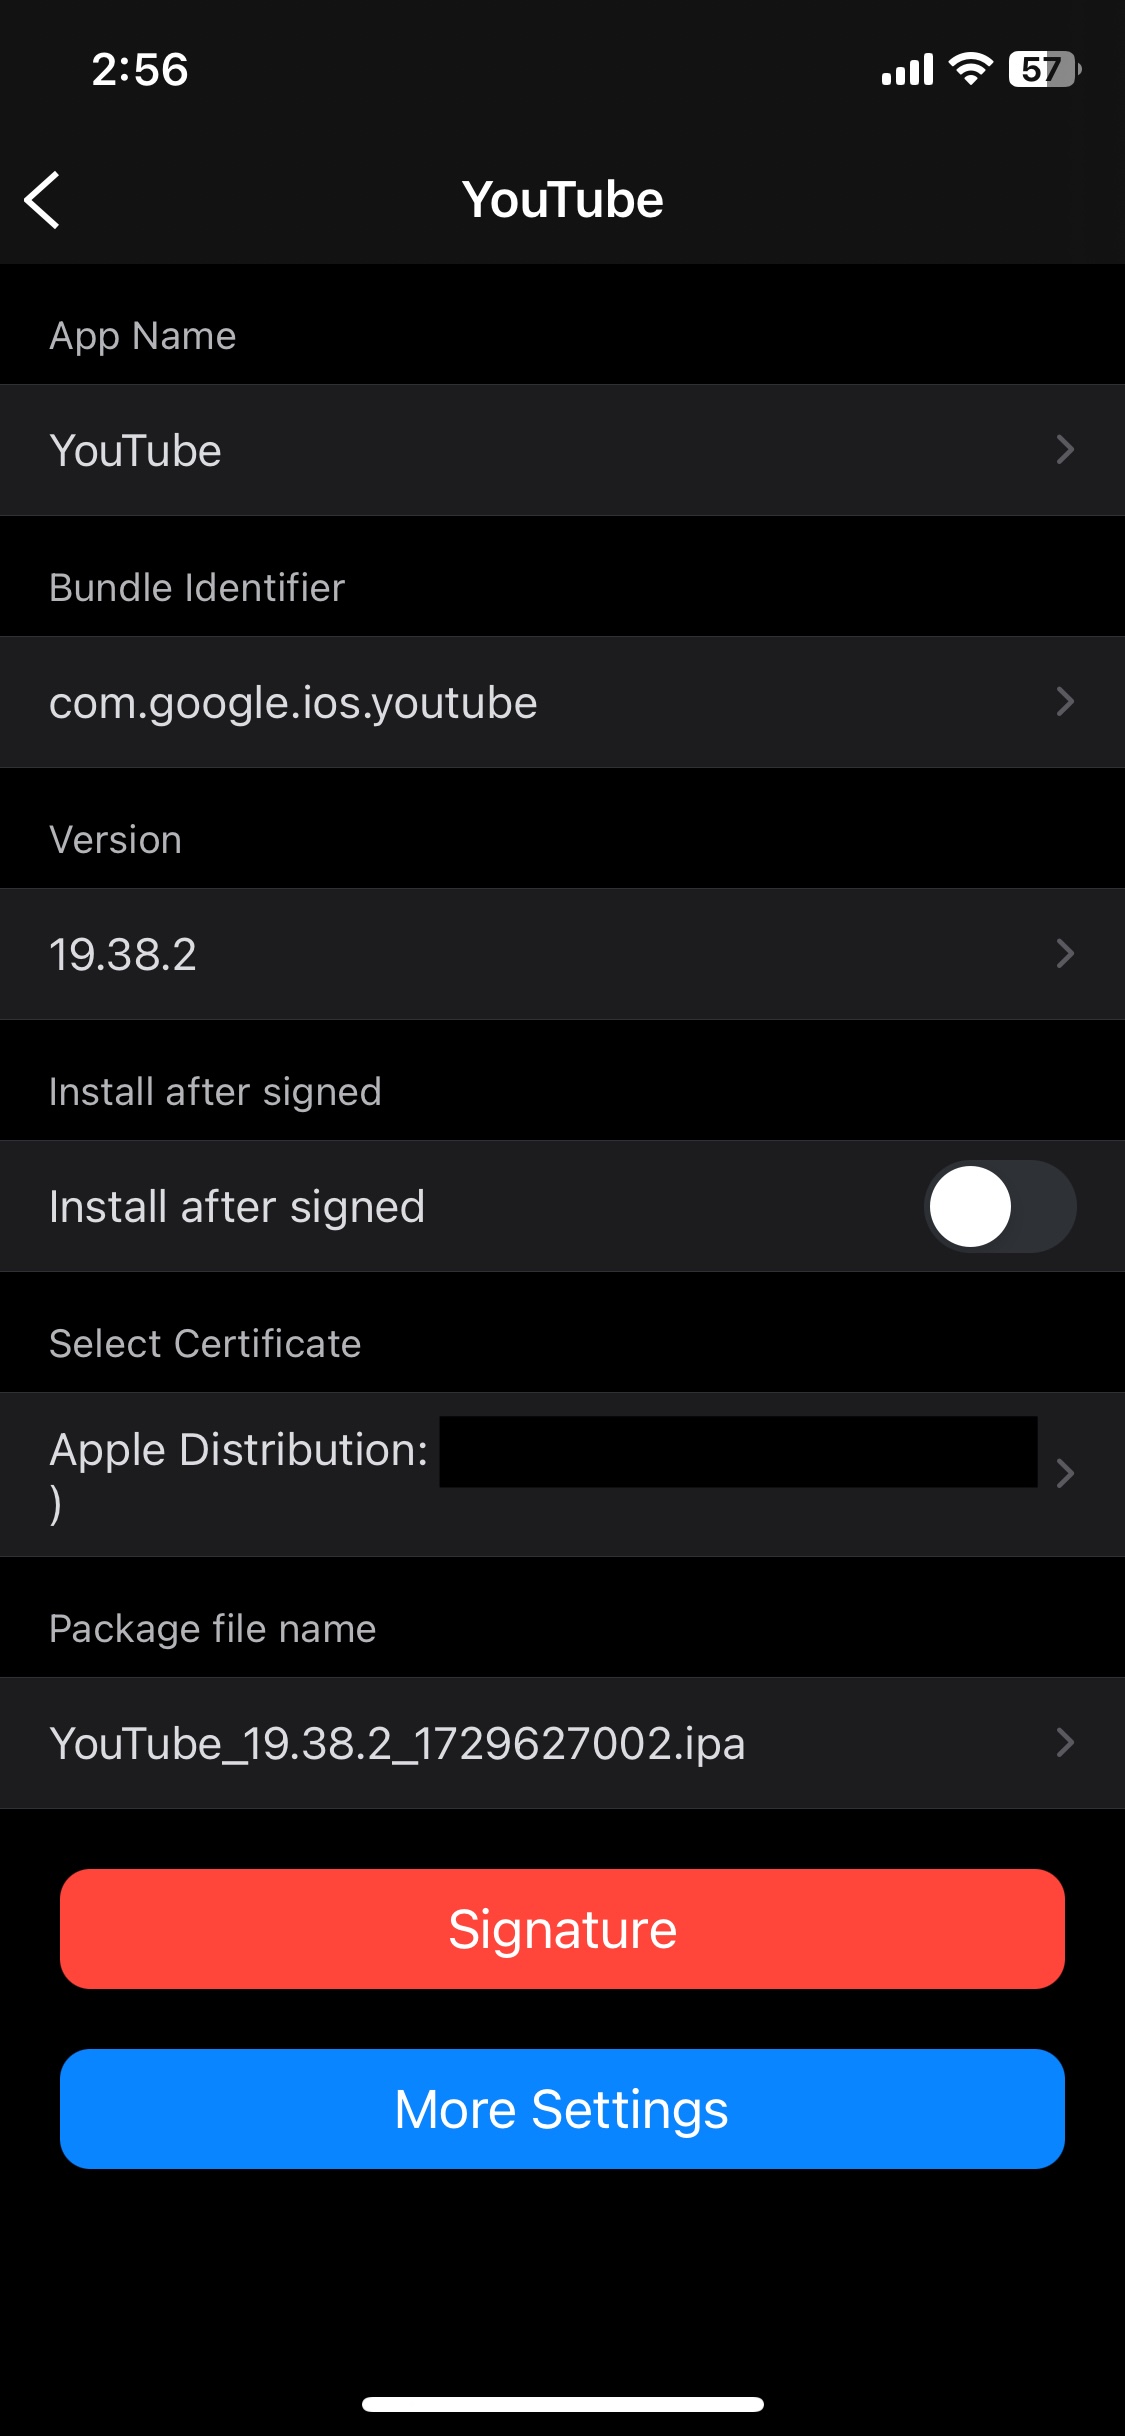
The signing progress may take some time depending on the size of your IPA files, so please wait for it to complete.
And you're all set! If your device is running iOS 17.6 or below, simply select "Install," confirm the installation, and the app should appear on your home screen. If not, please follow the steps below.
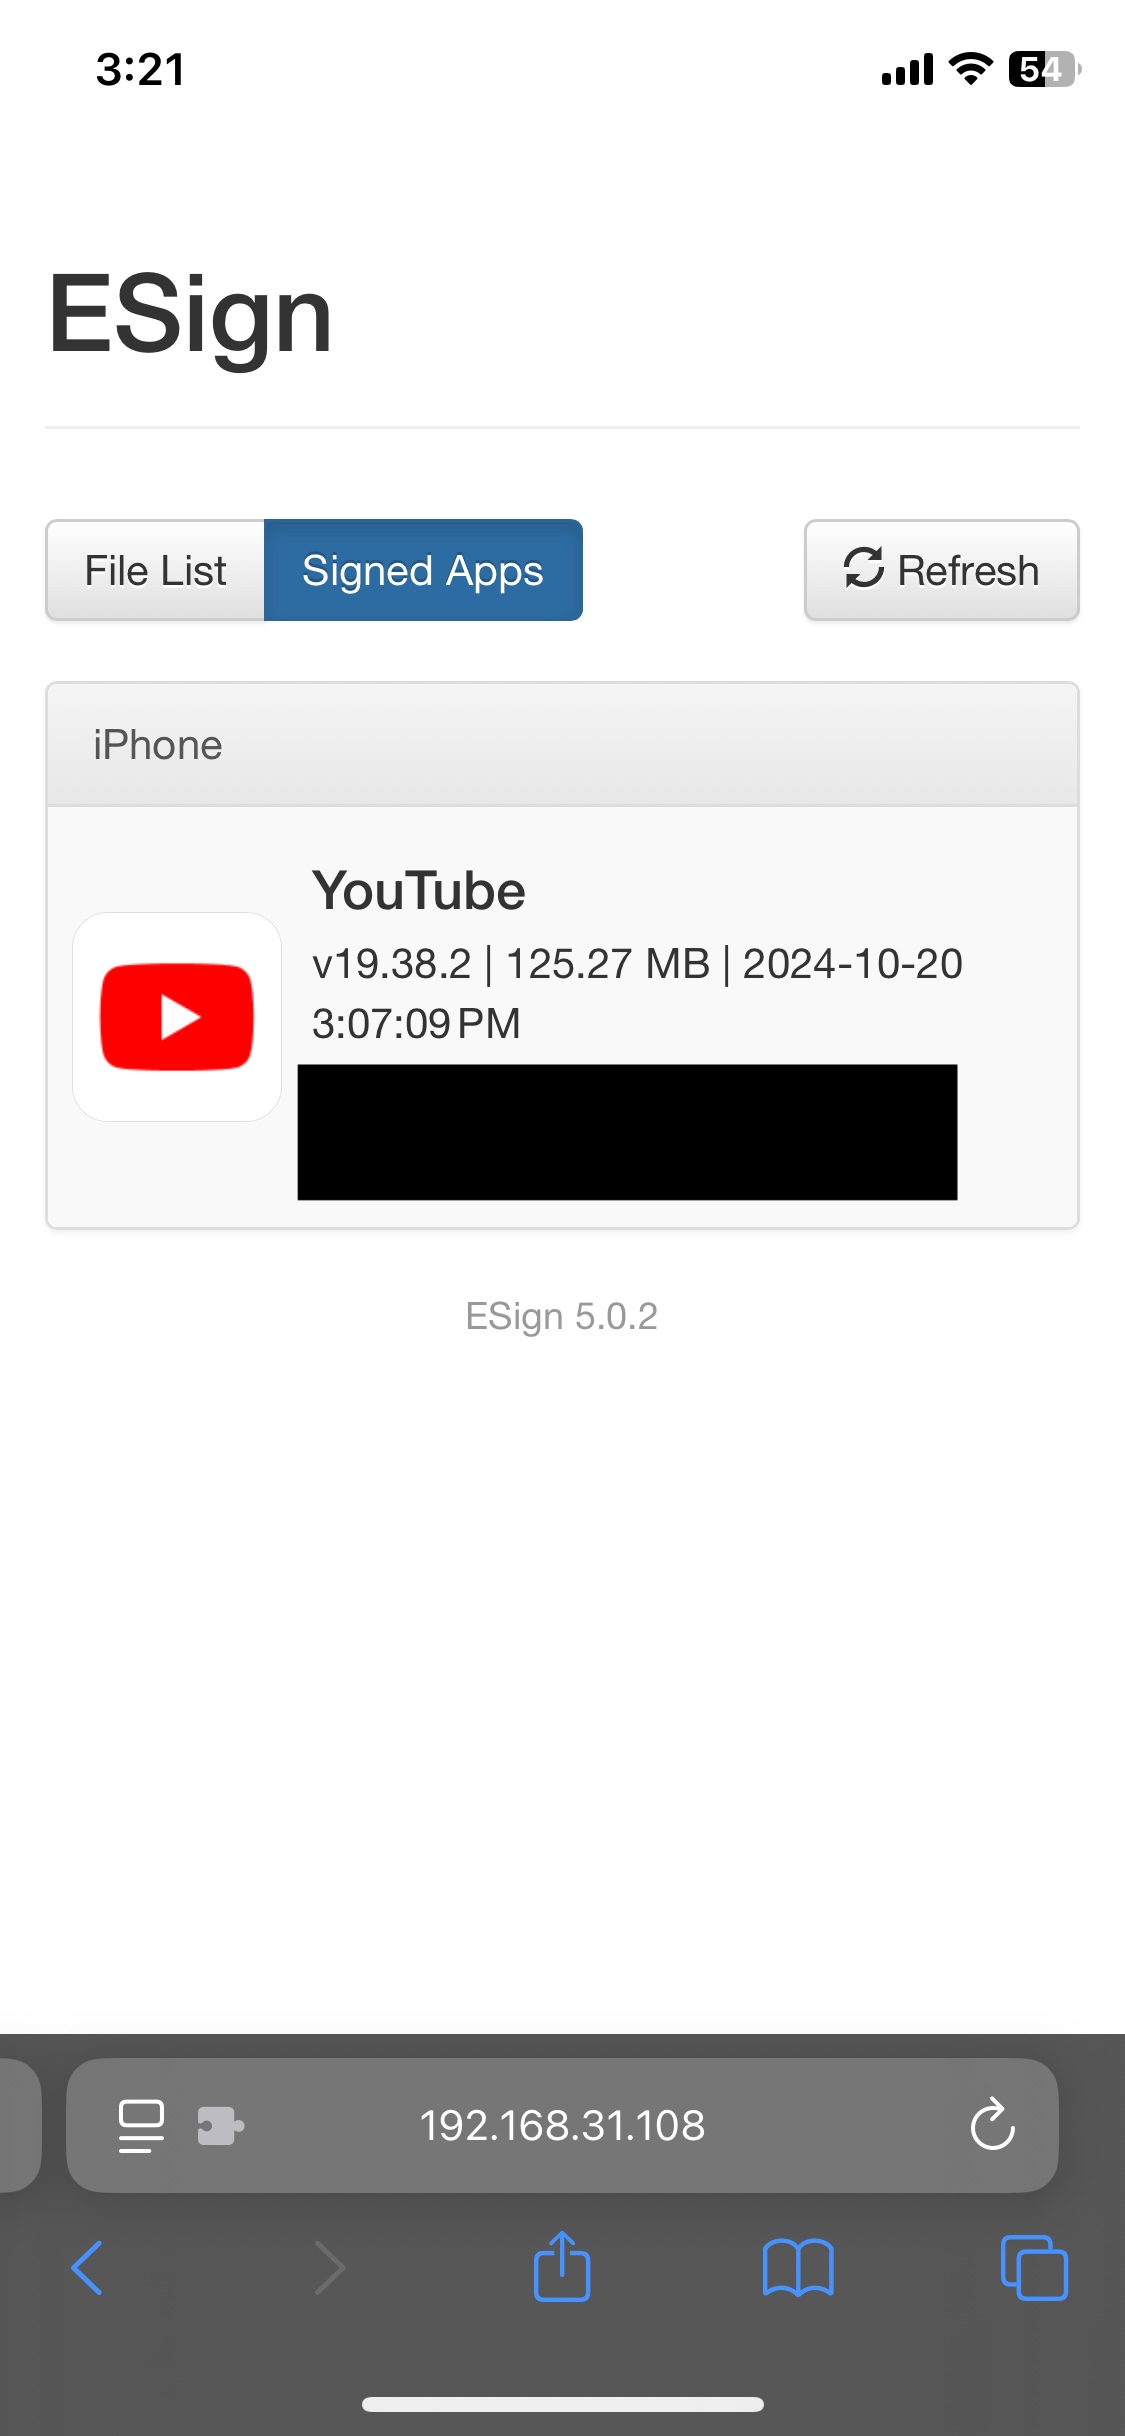
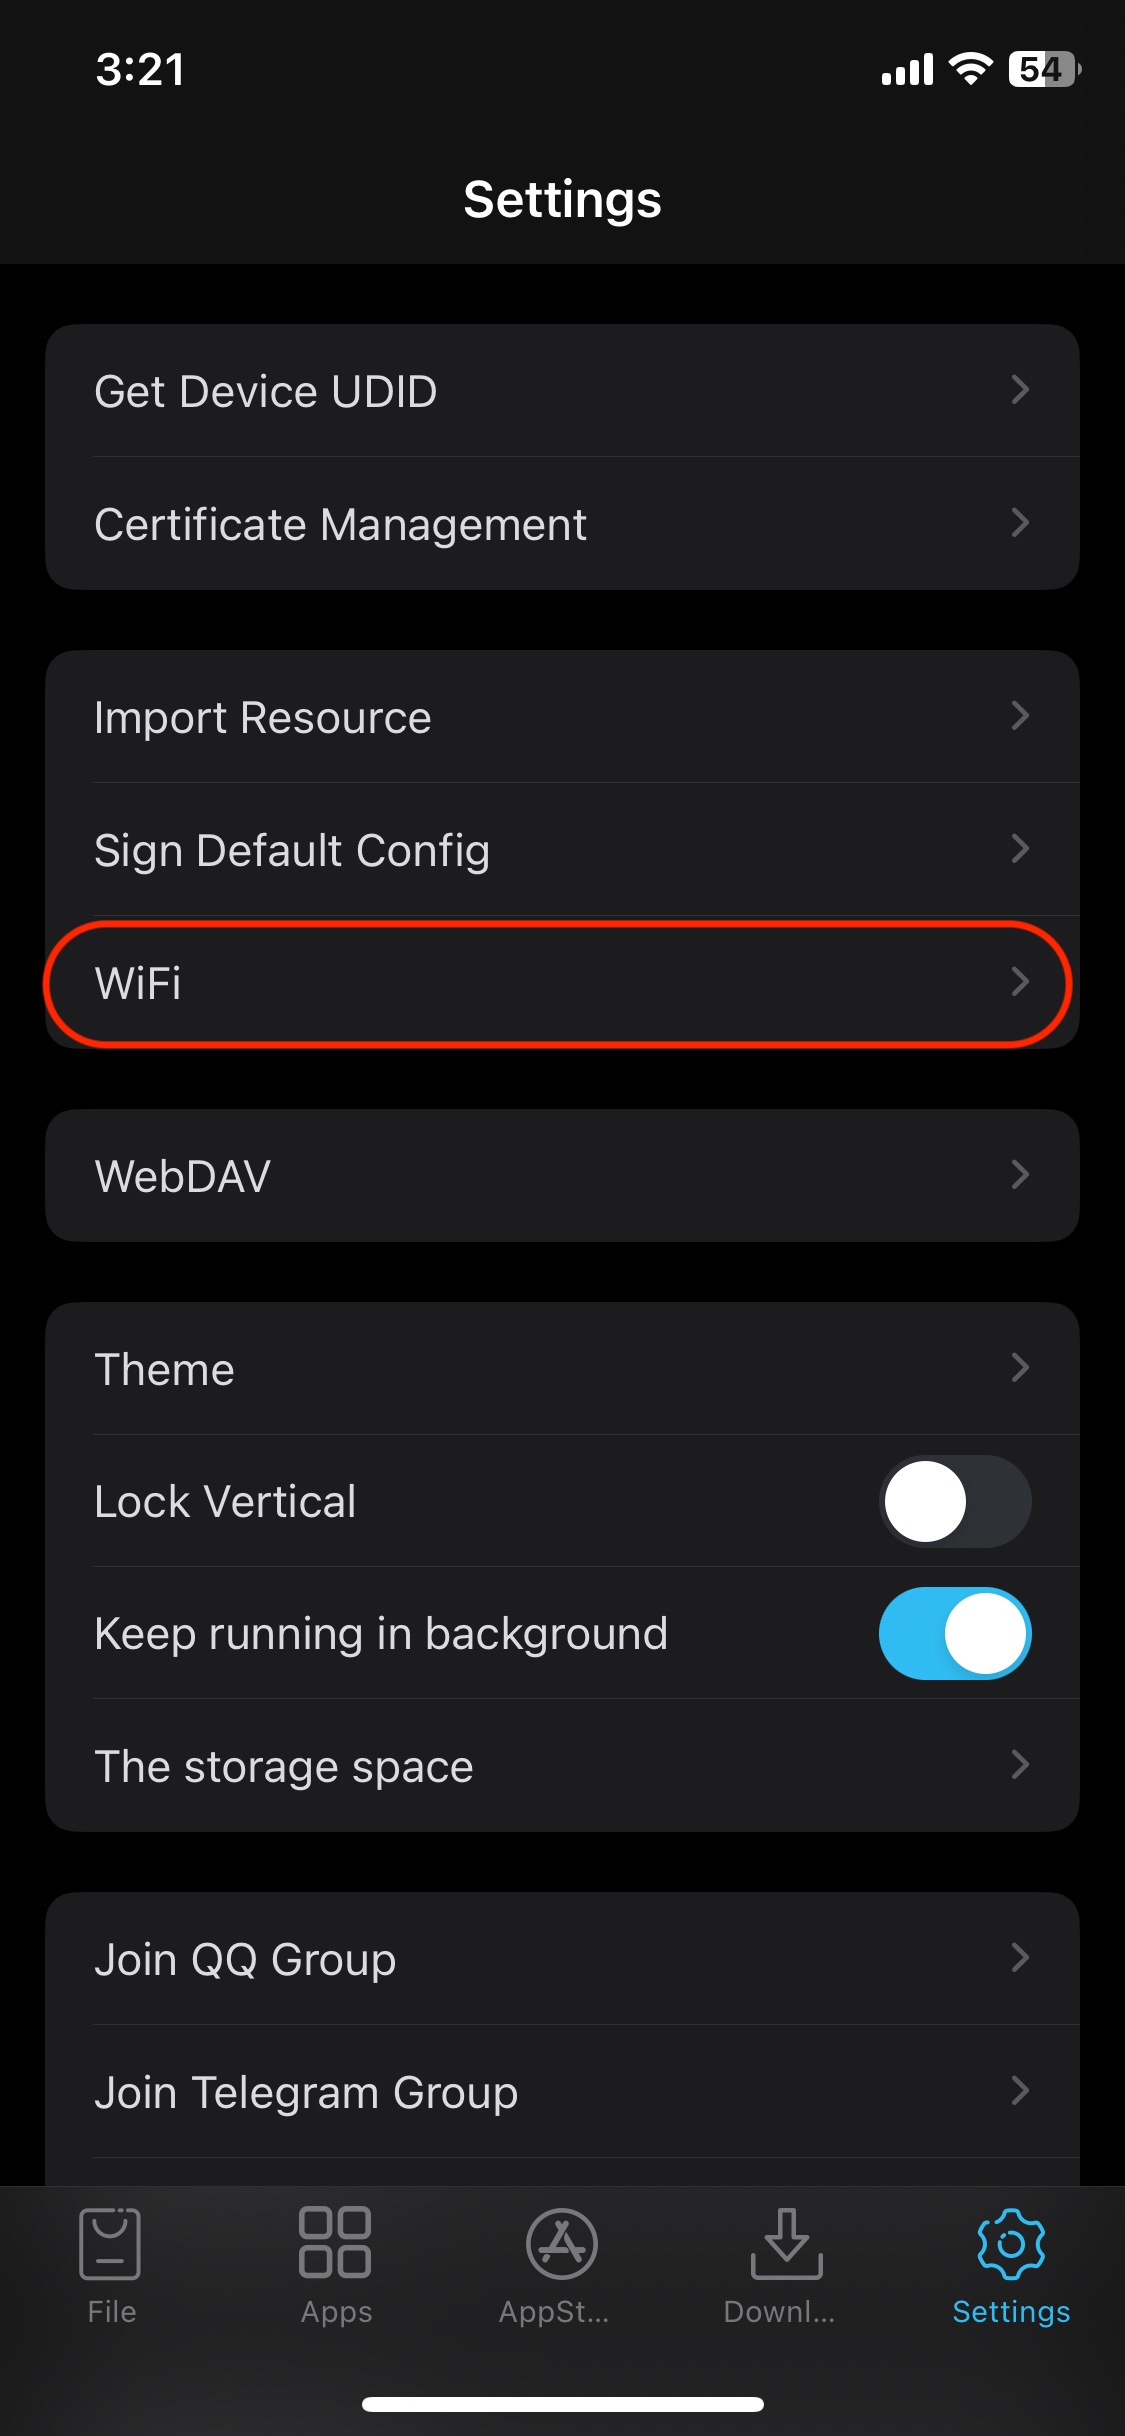
Install with Wifi
Warning: This section is applicable only to iOS 18.
Return to the Settings tab, select WiFi, and you should see a local URL. Click on the link to copy it to your clipboard, then paste it into Safari or your preferred browser.
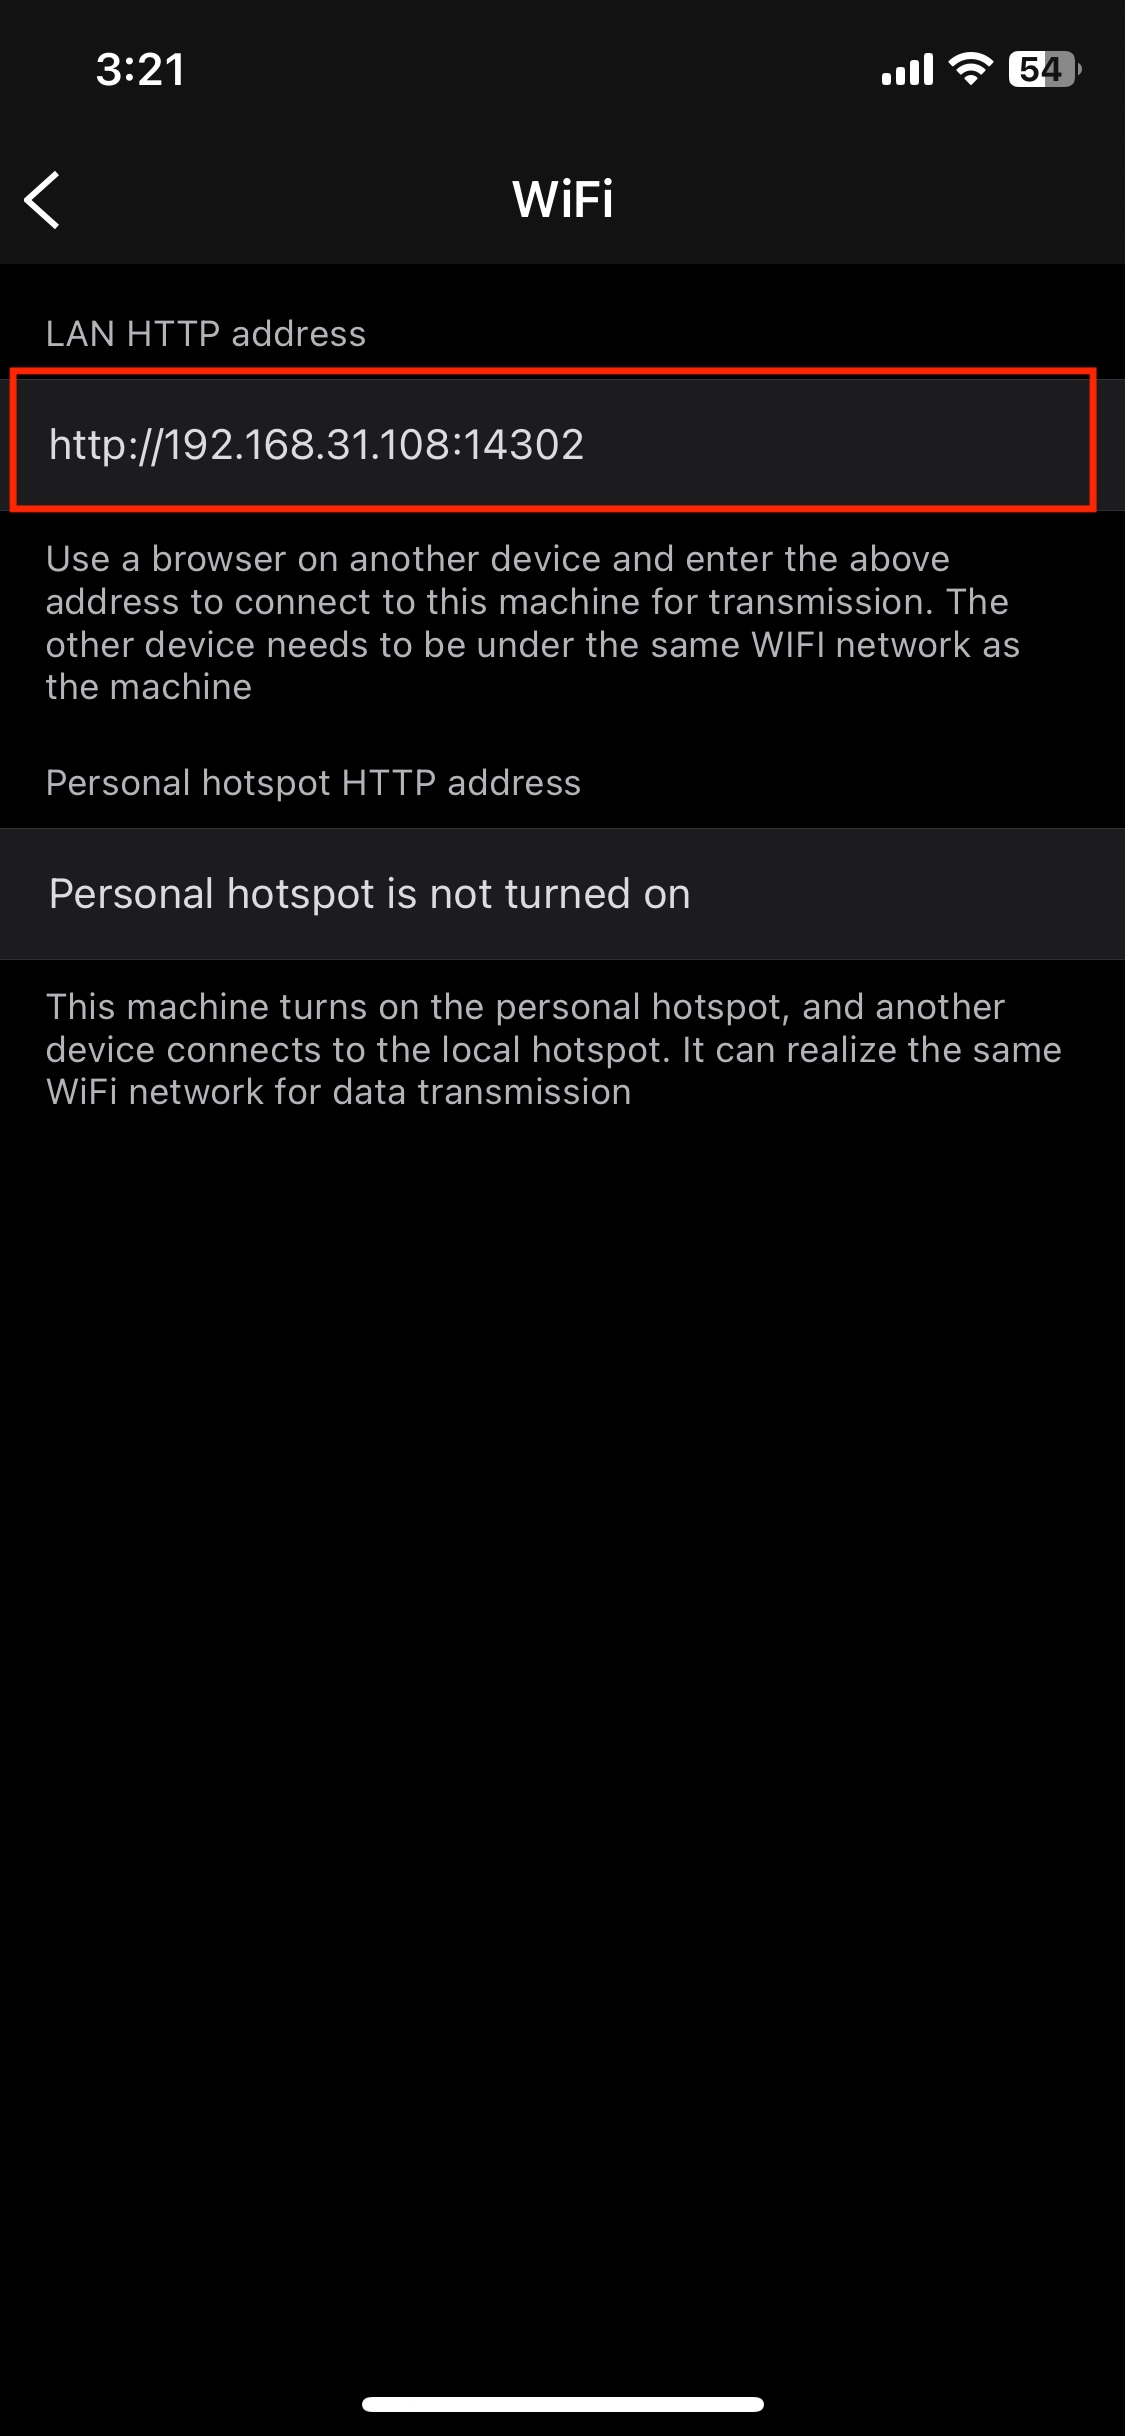
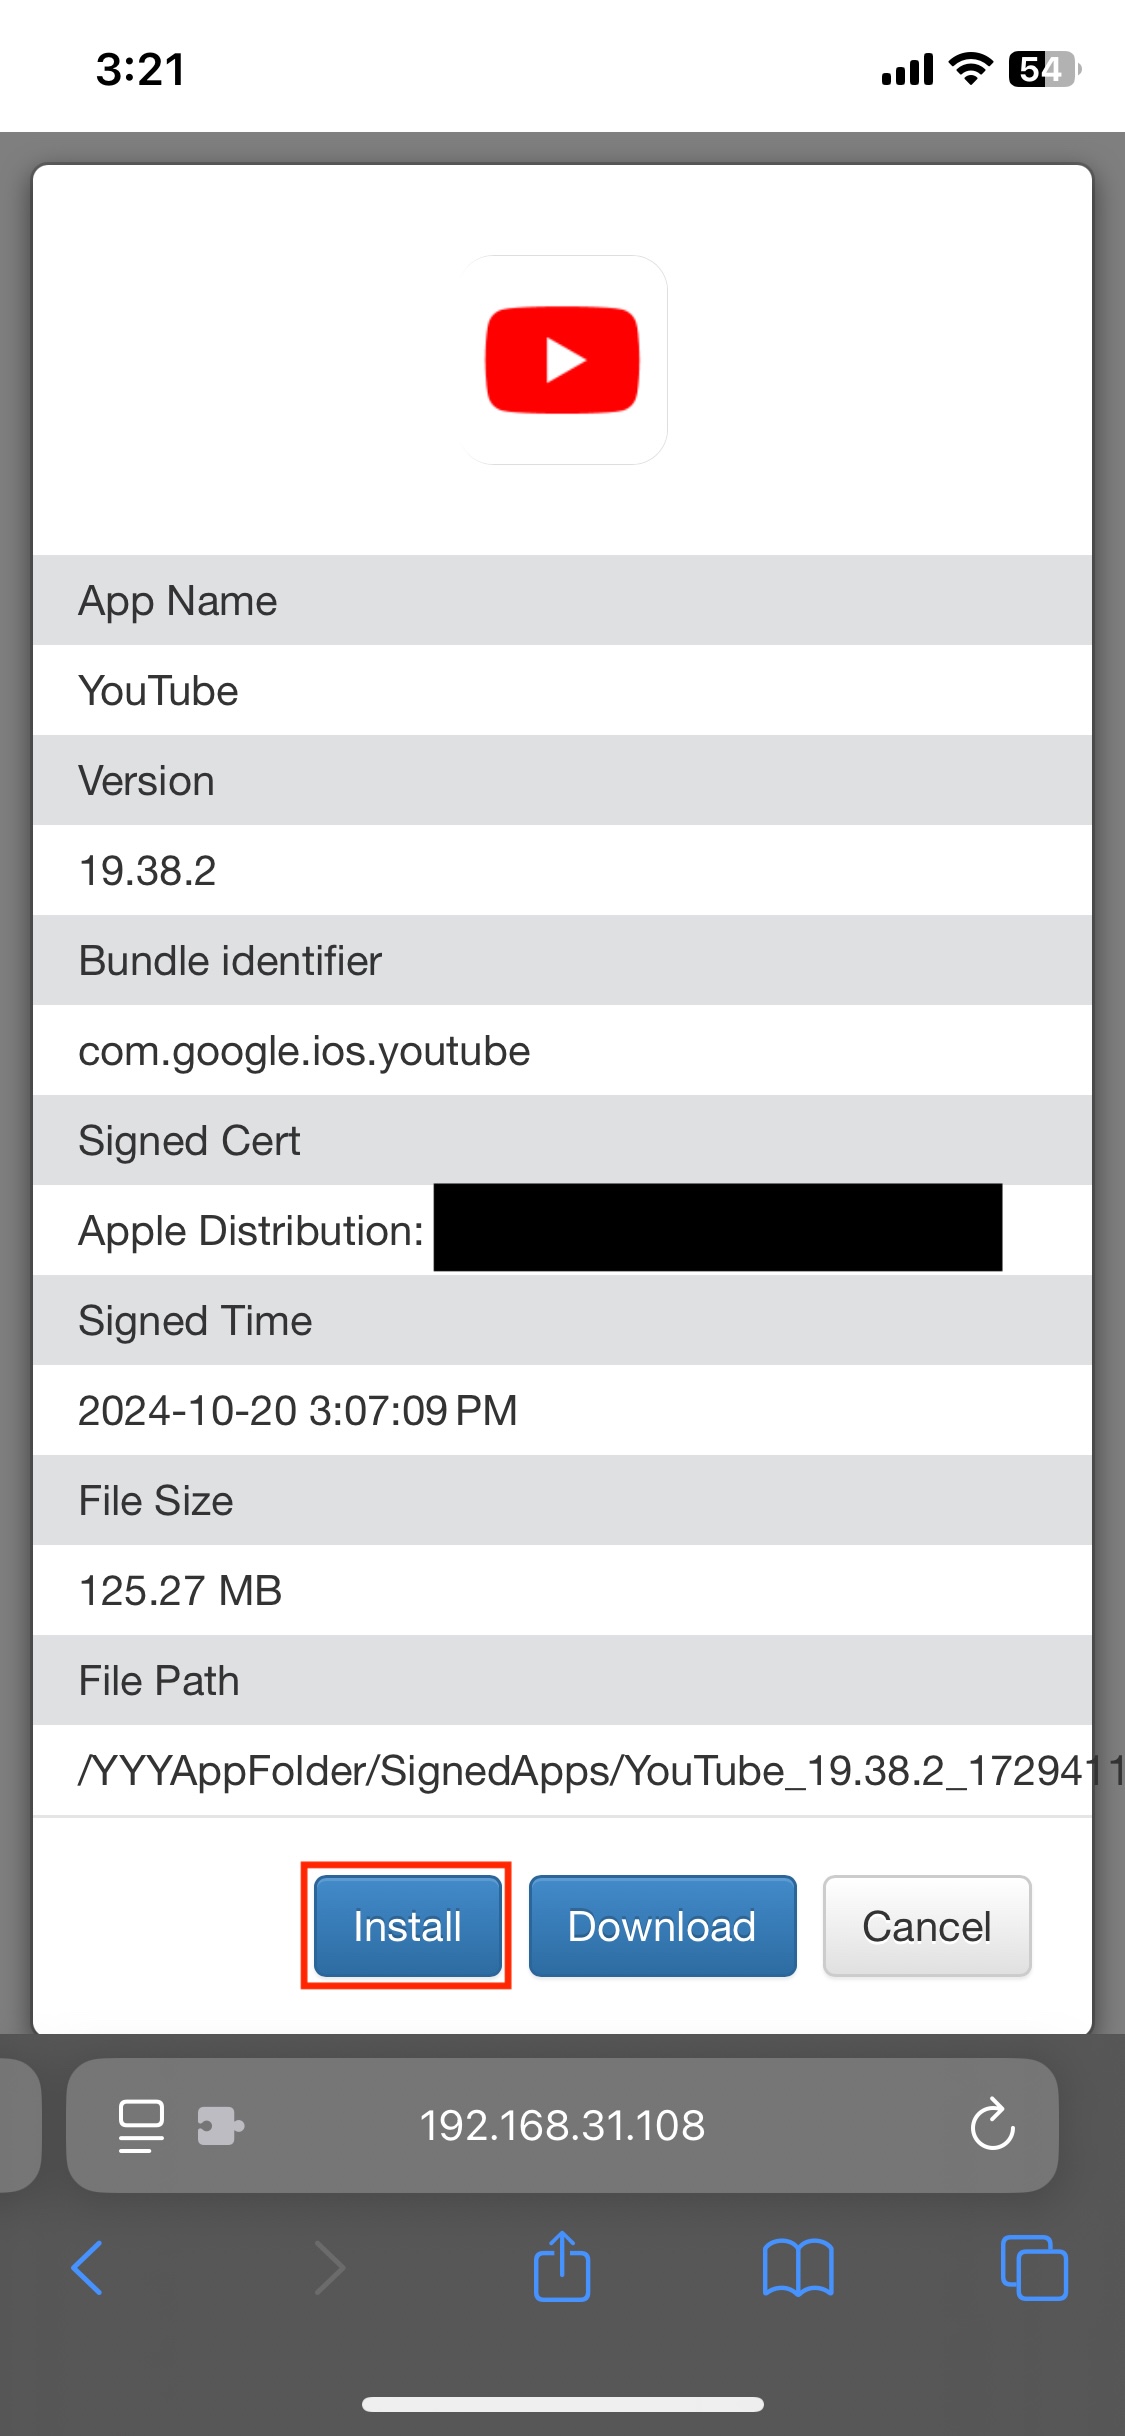
You should now see the ESign web page. Select the "Signed Apps" tab, click on the app you want to install, press the Install button, and confirm the installation.